
This is my entry in Brickcentral’s monthly themed activity: #bcteamwork
Our goal was to craft a scene where several minifigures/characters join forces, doing something epic, or cute, or crazy, or something very simple. Totally up to us.
Our guidelines:
- use LEGO minifigures/characters (more than 4 different minifigures/characters please!)
- only new pictures
- use the hashtags #brickcentral and #bc_teamwork ( (but don’t tag Brickcentral in the pic, please).
- have fun!
Winners will be announced May 30th! Join me?
…
This is by far the busiest scene I have ever built. Our cast of characters includes:
- Wooden Minifigure, from the current LEGO Originals exclusive set 853967 LEGO Wooden Minifigure
- C3PO from the current Star Wars set 75271 Luke Skywalker’s Landspeeder
- Battle Goddess from the 2012 Series 12 Collectible Minifigures
- Battle Dward from the 2017 Series 17 Collectible Minifigures
- Royal Guard from the 2011 Series 5 Collectible Minifigures
- Indiana Jones from the 2008 set 7620 Indiana Jones Motorcycle Chase
- Jay Walker from the 2017 The LEGO Ninjago Movie Collectible Minifigures
- The Child from the current Star Wars The Mandalorian set 75299 Trouble on Tatooine
- Gandalf the White from the 2013 The Lord of the Rings set 79007 Battle at the Black Gate
- Thor (spongy cape, pearl dark gray legs) from the current Marvel set 76153 Avengers Helicarrier
Behind the Scenes
I enjoy sharing a look at the process behind my work and my creative journey.
Photography has long been my passion. With the level of technology available to us today, it’s easier than ever to take a technically competent photograph. And yet, some images still clearly ‘work’ more than others.
With LEGO photography, where we can often control almost every aspect of the scene, I believe that investing time and mental energy in the creative process can help make that difference. So I consider four fundamental things in making an image:
- The Idea
- Light
- Subject Isolation
- Composition
The Idea
Today’s scene was inspired by Jonathan Swift’s book Gulliver’s Travels, published in 1726. This English literature classic satirized human nature and it cultural influence and references remain today.
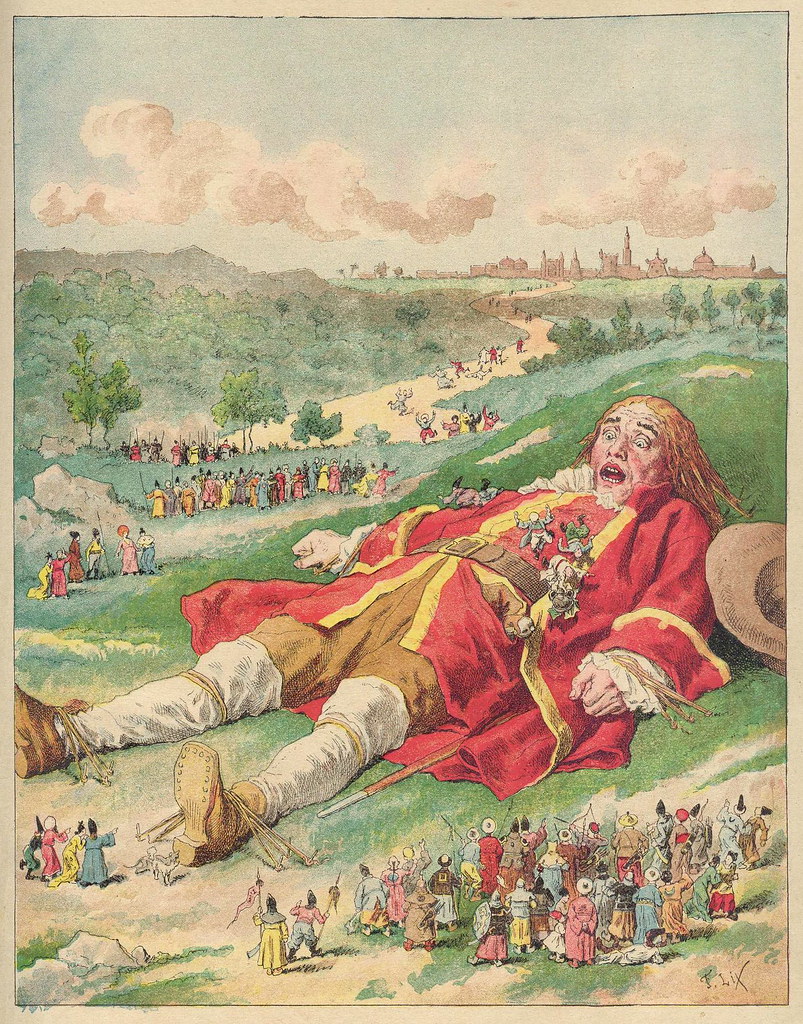
During his first travels, Gulliver washes ashore after a shipwreck and finds himself a prisoners of a race of tiny people: the Lilliputians.

I built my brick version of this scene upon a black ceramic tile, using assorted LEGO parts as restraints.
Light
My preferred style is low key photography: predominantly dark and dramatic scenes, with only the subject highlighted with a single light.

Given the complexity of this scene, however, I ended up using three lights:
- Main: Litrapro with grid, aimed at the wooden minifigure’s hands, positioned by Platypod gooseneck arm and Ultra tripod base.
- Fill 1: Litrapro with softbox, aimed at the front row of minifigures, positioned by Platypod gooseneck arm and Ultra tripod base.
- Fill 2: Litrapro with softbox, swept across the scene, held with a Platypod gooseneck arm
In order to fill the shadowed nooks and crannies, I ended up lightpainting with my second fill light. As I’d stopped down to f/11 for extra depth of field, I was able to take advantage of the 4 second exposure to do so.
Subject Isolation

I wasn’t able to isolate the wooden minifigure with my normal methods of lighting and colour, so I relied on his size (both relative to the other characters, and how I filled the frame with him) and on having all of the other characters focussed on him.
Composition
I try hard to get as close to the final image as possible in camera. To help with this I compose in live view with my mirrorless camera’s rear display, using a crop mask and grid overlay. It looked almost exactly like this:
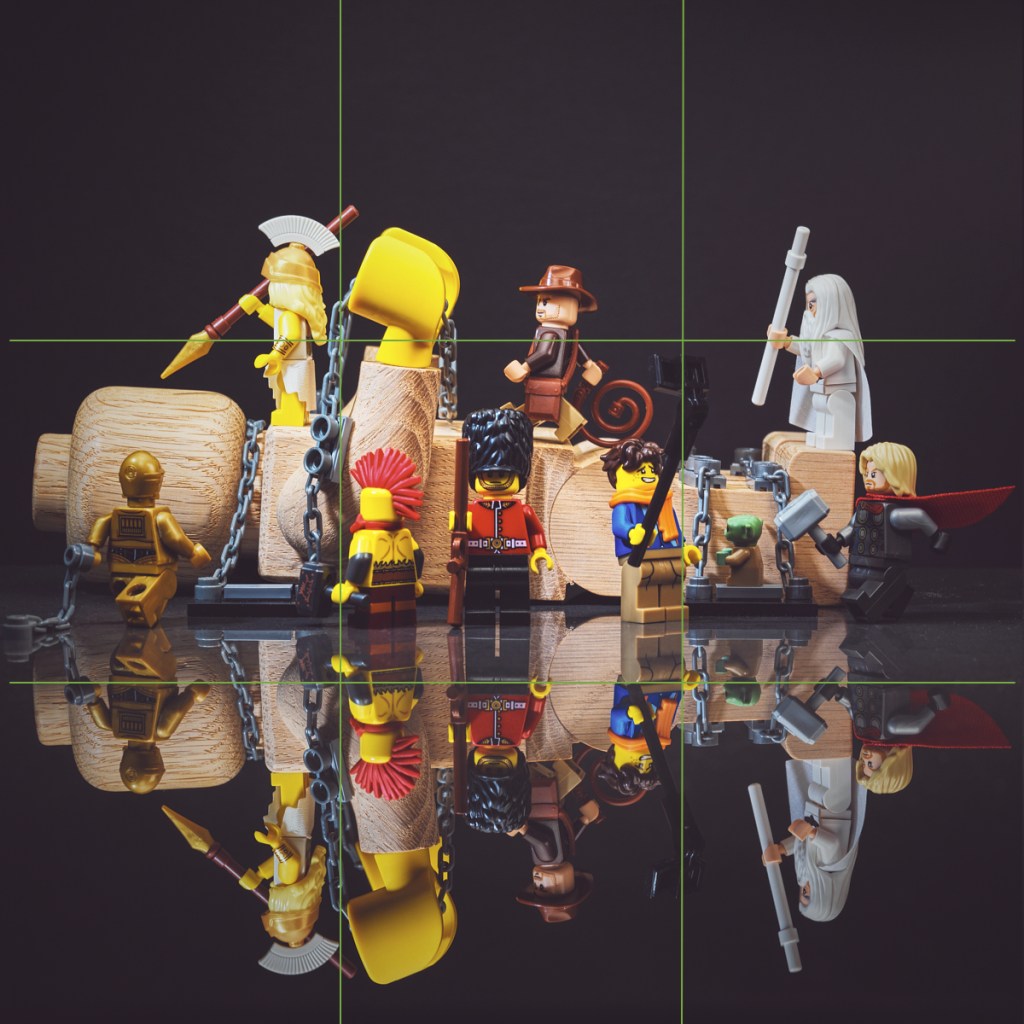
I composed using rules of thirds, using the chain next to his hand as the anchor point. ( I had wanted to use his hands for this, but it didn’t quite work out).
It’s a busy scene, far busier than I usually build. Nonetheless, I was able to leave most of the top third as negative space to help things breathe a little.
Tech Stuff
Instead of sharing the exact technical settings for this one photo, I’d rather share my standard operating procedure for, which can be applied to all of my LEGO photography with but few exceptions:
- Tripod mounted mirrorless camera set to ISO 100 and triggered with 2 second delayed shutter
- 120mm macro lens shot at f/8 and manually focused using magnified live view
- Note: as mentioned above, I shot at f/11 today to gain depth of field and to lengthen the exposure for light painting
- Aperture priority centre-weighted metering with exposure compensation to taste
- Post processing the RAW files with custom white balance, luma curve, saturation, contrast, sharpness, vignette, levels, and dust removal
Up Close and Personal
Macro photography allows us to see small objects in spectacular detail. For me, LEGO minifigures are perfect subject material.

I chose to focus on the logo found on top of the wooden minifigure’s head. Love the wood grain detail.
Wrap Up


Time once again to close out with the before and after shots. There’s less of a transformation than usual for me through lighting, subject isolation, and composition choices. The result feels more documentary than artistic to me and I’m not fully satisfied – I may come back to this someday.
Best,
Scott.
