#tbt to my favourite retro bounty hunter. But that brick cell phone… ugh.
#throwbackthursday
…
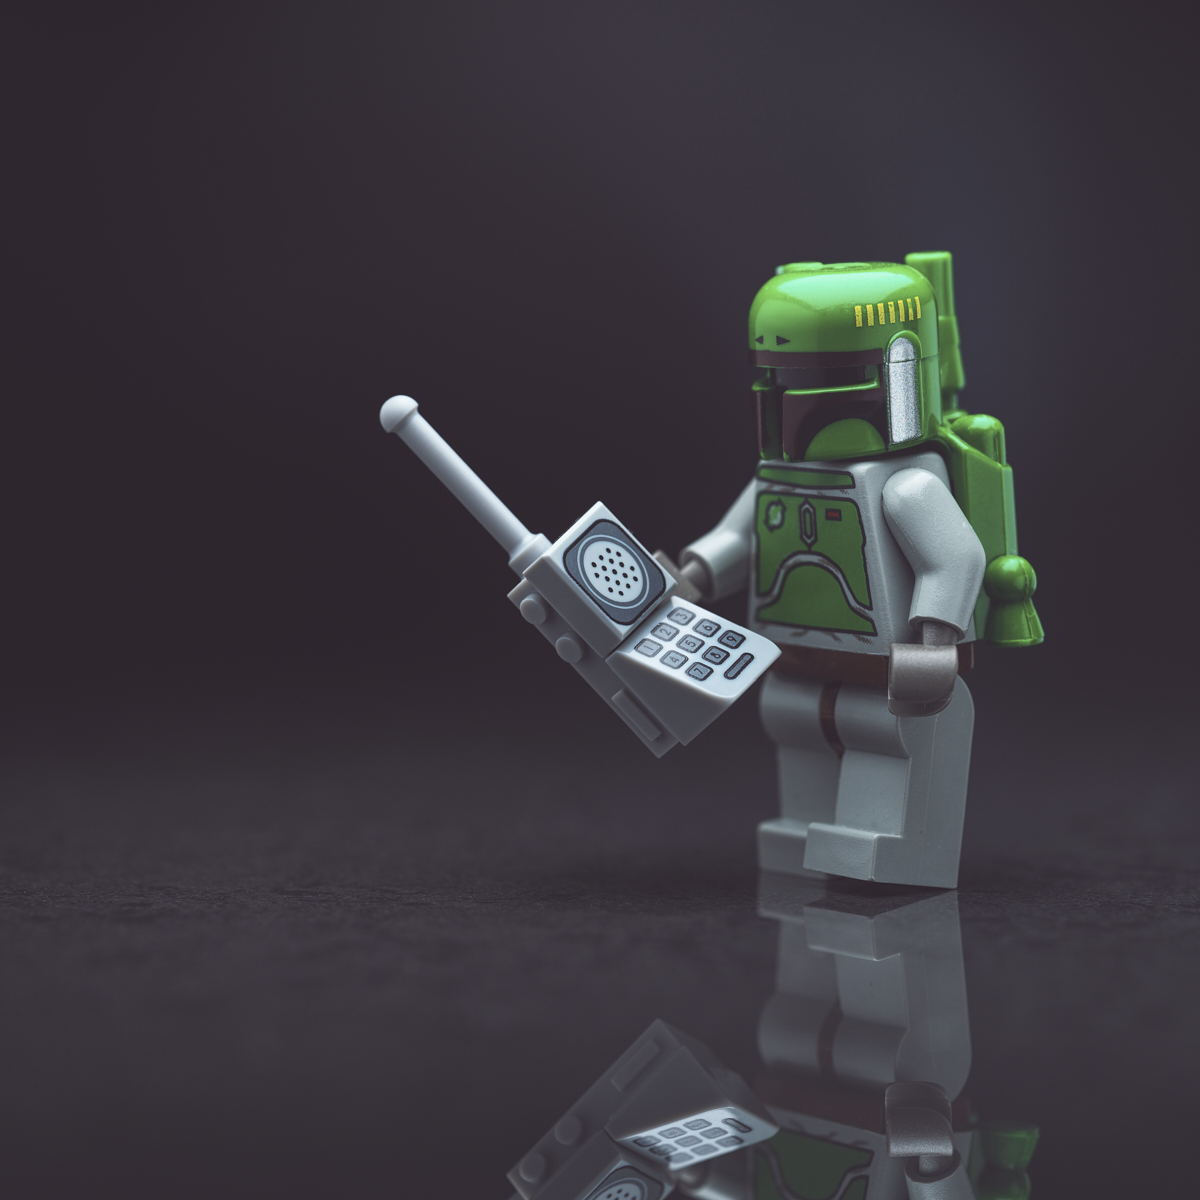
Today’s vintage minifigure is Boba Fett – Classic Grays, circa 2000-2003, from either the Star Wars set 7144 Slave I or 4476 Jabba’s Prize. (we have both, and I’m not sure which one this is from). The monstrosity of a cellphone he’s carrying is borrowed from the Colllectible Minifigures Series 17 Yuppie.
Behind the Scenes
I enjoy sharing a look at the process behind my work and my creative journey.
Photography has long been my passion. With the level of technology available to us today, it’s easier than ever to take a technically competent photograph. And yet, some images still clearly ‘work’ more than others.
With LEGO photography, where we can often control almost every aspect of the scene, I believe that investing time and mental energy in the creative process can help make that difference. So I consider four fundamental things in making an image:
- The Idea
- Light
- Subject Isolation
- Composition
The Idea
I’ve been meaning to photograph this minifigure for some time, and it felt right to do so on a #throwbackthursday. Being in a whimsical mood, I scanned my collection for a fun accessory, found the cellphone, and decided to put the two together in a simple scene.
With some help from sticky putty, I posed him in a leaning position on top of a piece of black ceramic tile.
Light
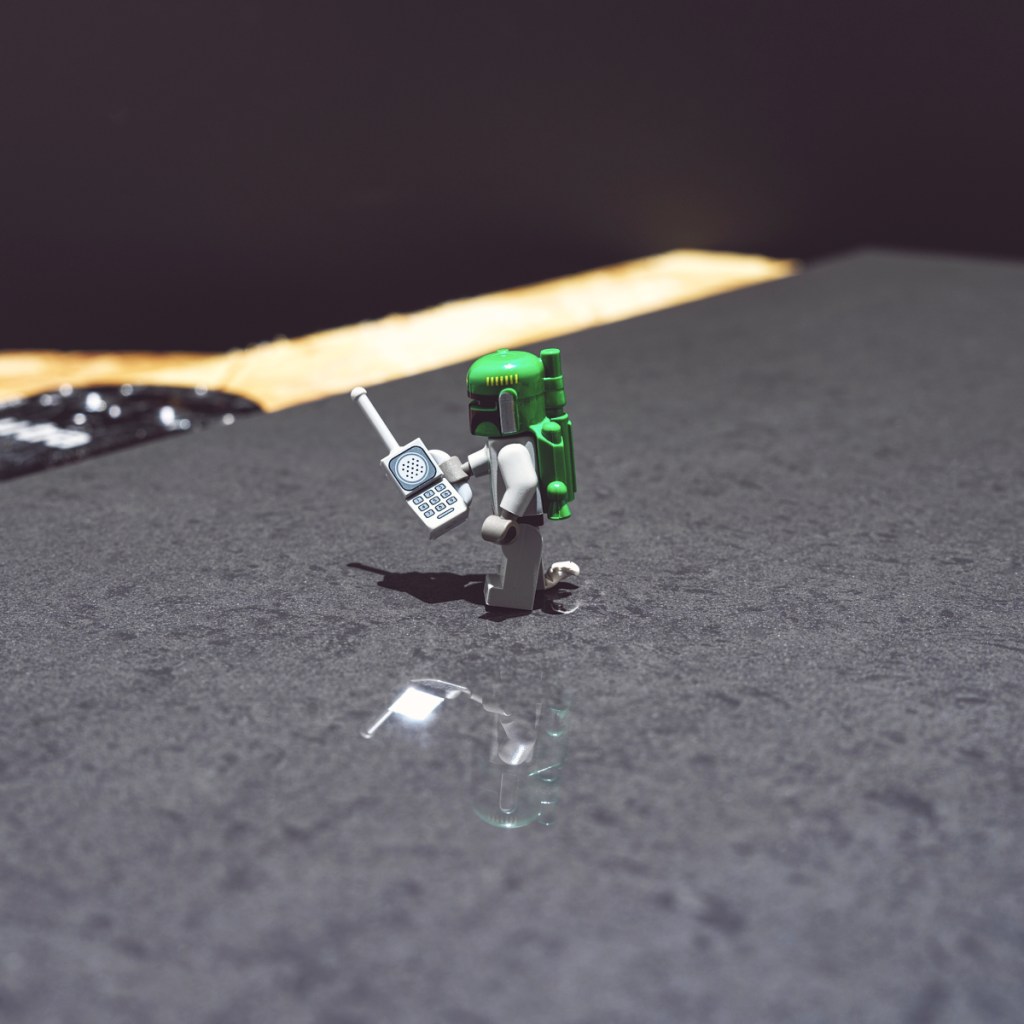
My preferred style is low key photography: predominantly dark and dramatic scenes, with light emphasizing only specific areas of the frame.
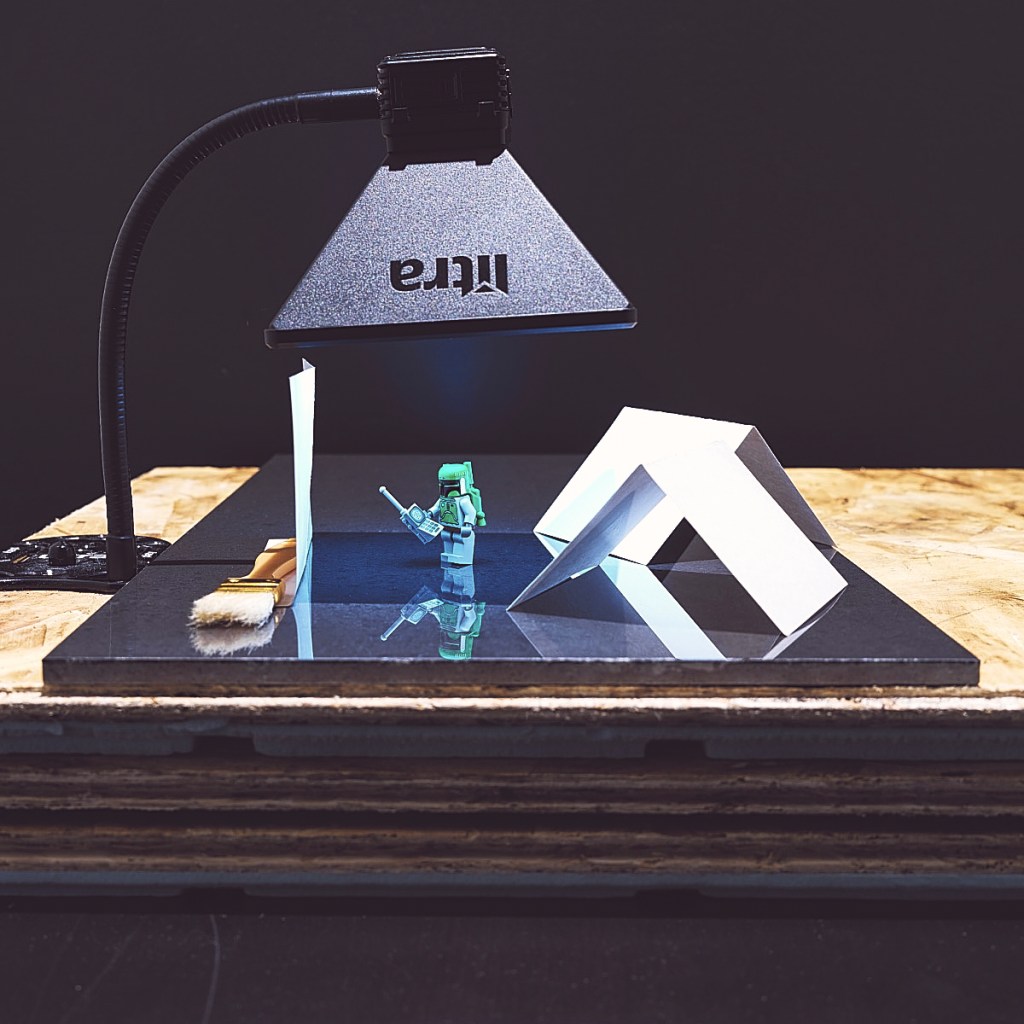
As shown above, I used a two light setup with three DIY bounce cards:
- Main: Litrapro with softbox, positioned with a Platypod gooseneck arm and Ultra tripod base
- Background: Litrapro lying flat on a table top, shining on a black wall
- Bounce cards: three 10×15 cm white folded recipe cards
I chose this setup to provide soft lighting on Boba Fett, with the bounce cards filling in the shadows. For those curious, the one on the left is being anchored by a small brush that I used for sweeping dust off the tile just before I shoot – this saves time in post.
On the right side, and for the first time, I ended up using two bounce cards – I found this is what is took to bring the best out of his rocket pack.
The background light is very subtle, but adds a slight halo to the minifigure and softens the background.
Subject Isolation
The subject is ultimately what the photo is about and there should be no doubt in the viewer’s mind as to what it is.

Given my minimalist style, there is no question here. But who is he calling?
Composition
I try hard to get as close to the final image as possible in camera. To help with this I compose in live view with my mirrorless camera’s rear display, using a crop mask and grid overlay. It looked almost exactly like this:

I put some care into this composition. I’m shooting him from a three-quarter view position, about halfway between front and profile views. This helped me to hide the sticky putty behind him, and to put him in a leaning pose that suggests motion. I also swung his left arm slightly forward and with a twist to his hand, as if he were about to push a button. Finally, this angle allowed me to show as many design elements as I could: his mandalorian armour plates, front and side helmet details, and part of the rocket pack.
Placing the phone on a diagonal helps makes the scene feel more dynamic. It also allowed me to not only hide the handle behind it, but also to show both the face and side buttons.
I then composed using rule of thirds, using his the part of the visor over the centre of his torso as an anchor point. As a supporting element to the scene, I placed the phone antenna at the adjacent rule of thirds intersection.
I didn’t show a full reflection, since I wanted to be in close enough to see a high level of detail on the phone. Instead, the reflection just catches a part of the phone, reinforcing it as a story element.
Finally, I left the remainder as negative space, further drawing the viewer in to the character.
Tech Stuff
Instead of sharing the exact technical settings for this one photo, I’d rather share my standard operating procedure for, which can be applied to all of my LEGO photography with but few exceptions:
- Tripod mounted mirrorless camera set to ISO 100 and triggered with 2 second delayed shutter
- 120mm macro lens shot at f/8 and manually focused using magnified live view
- Aperture priority centre-weighted metering with exposure compensation to taste
- Post processing the RAW files with custom white balance, luma curve, saturation, contrast, sharpness, vignette, levels, and dust removal
Up Close and Personal
Macro photography allows us to see small objects in spectacular detail. For me, LEGO minifigures are perfect subject material.
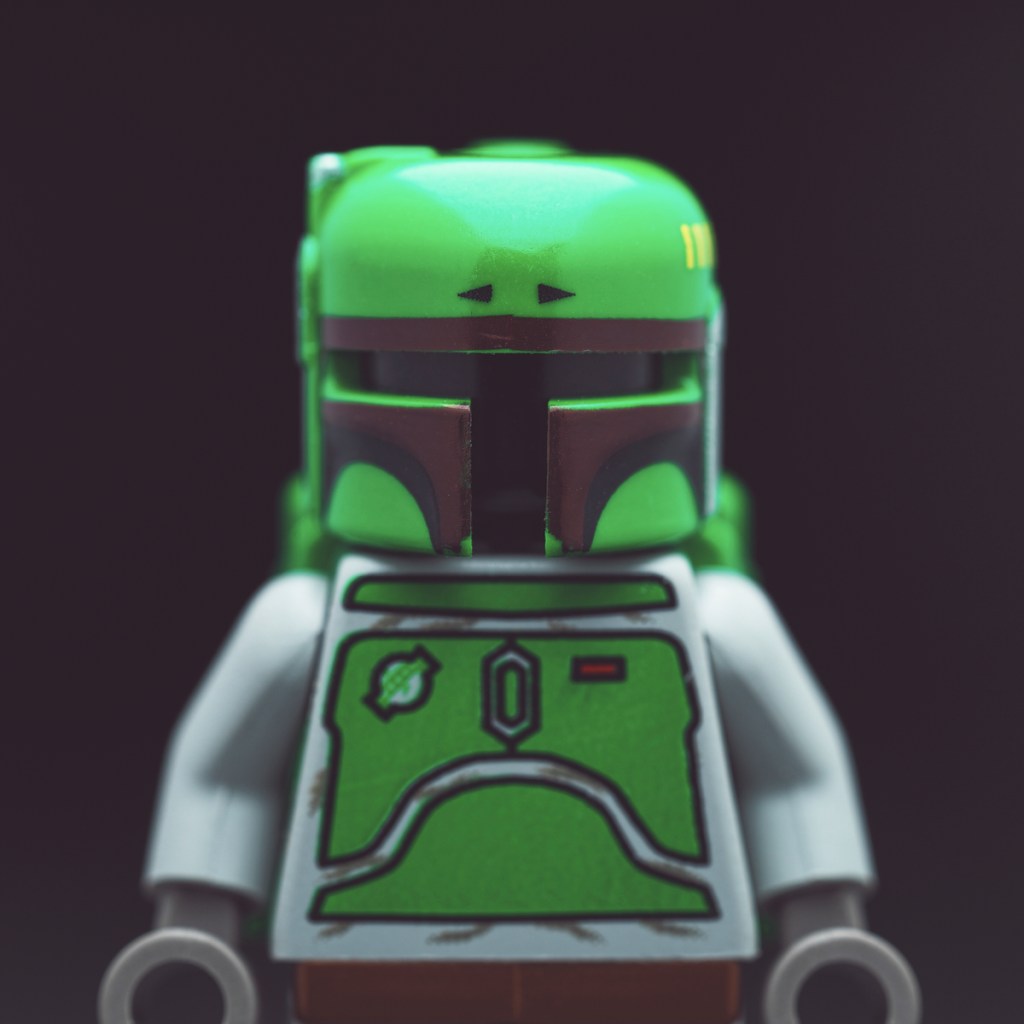
I’m working once again at my system limit – the only crop here is to make the image square. Even with a f/8 aperture, depth of field is incredibly limited. I focussed on the pair of arrows just above his visor, which itself begins to blur as it wraps around his head.
Here’s a closer view:

Wrap Up

Time once again to close out with the before and after shots, showing how I realized my idea through deliberate lighting, subject isolation, and composition choices.
Best,
Scott.
