
This is my final entry in the #bc_outatime monthly photo theme on #brickcentral , showing our best “out of time” stories.
I thought I would share a look behind the scenes, as this was my most ambitious lighting setup yet.
I take a deliberate approach to the creative process behind my LEGO photography, and consider four fundamental things before I even pick up my camera:
- The Idea
- Light
- Subject
- Composition
(for background reading on this framework, check out Ming Thein’s article The Four Things, redux)
The Idea
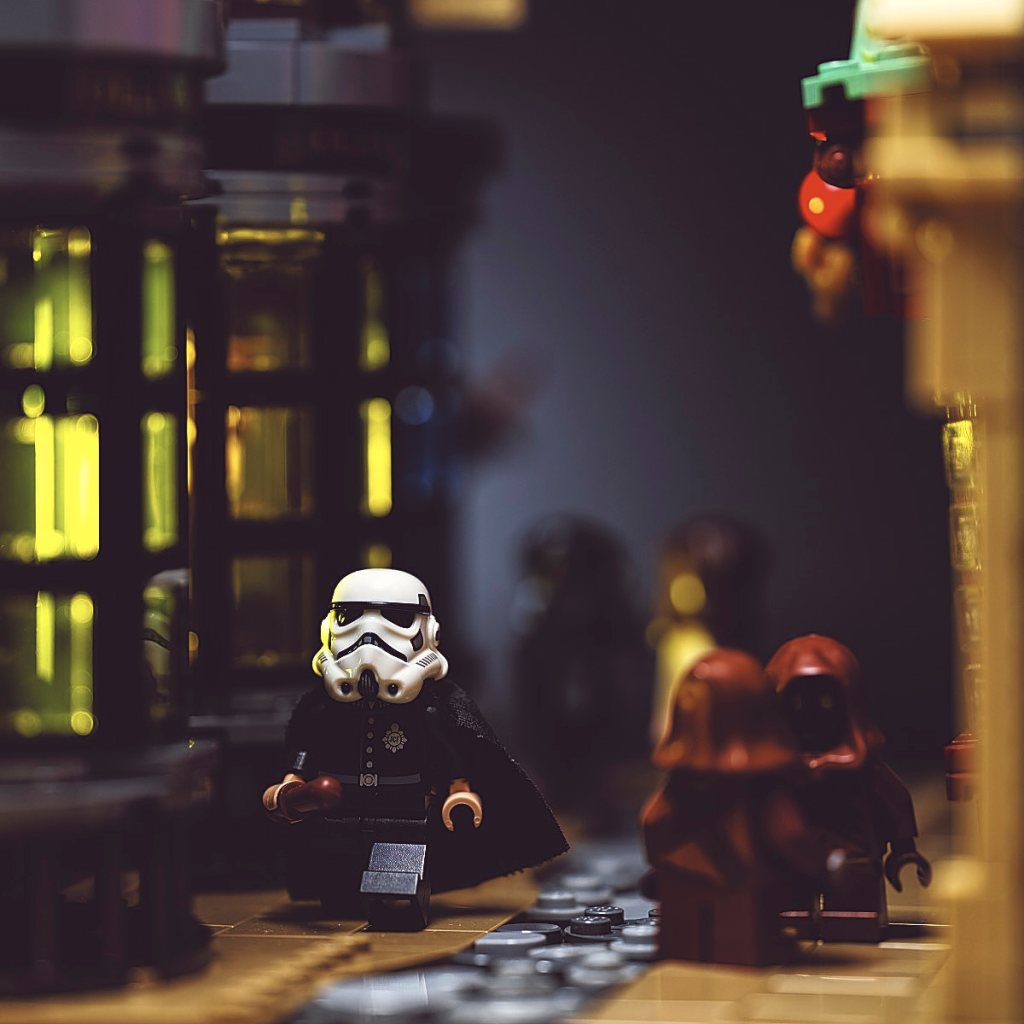
I’m a Star Wars fan, and I enjoy crossovers and mashups, so for this image I wanted to explore the idea of Mos Eisley residents transported through time and space into Victorian England.
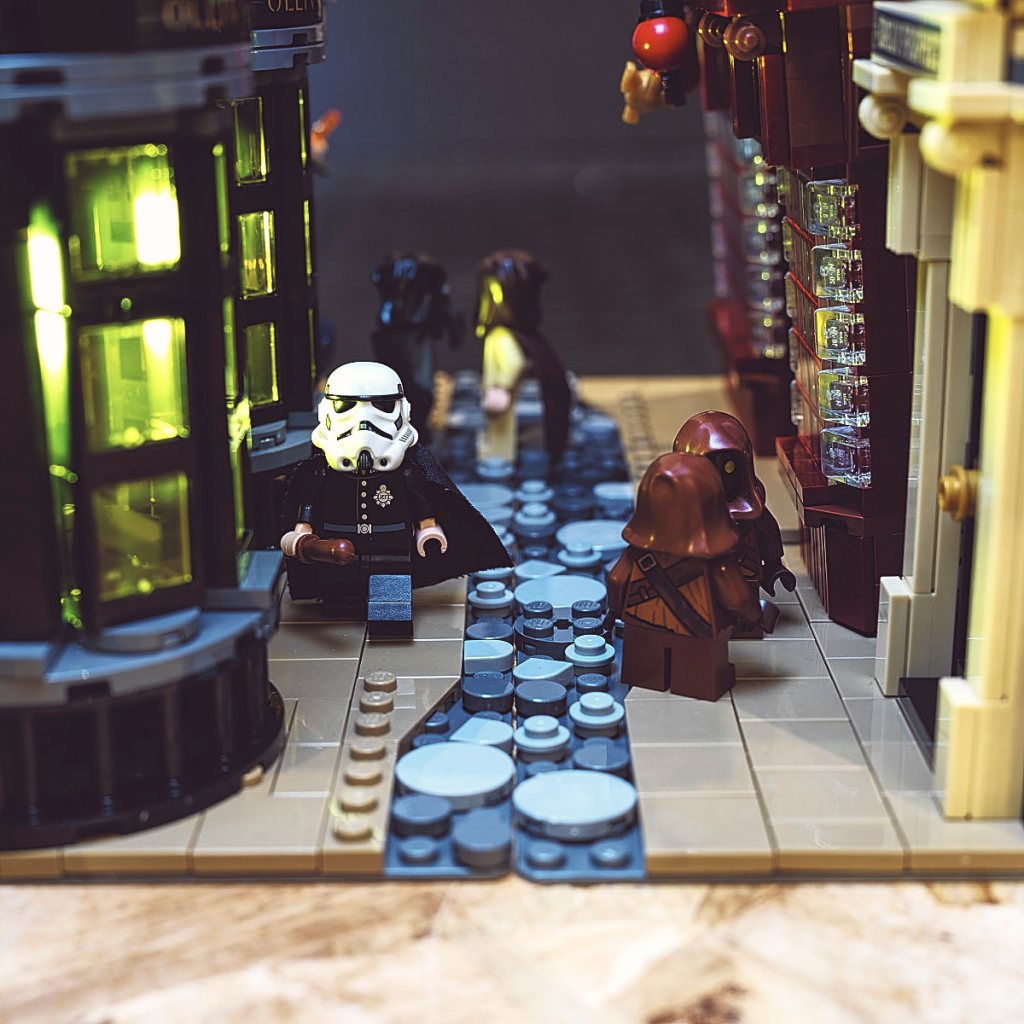
This documentary look at the scene shows how I set the stage with two buildings from the LEGO Harry Potter 75978 Diagon Alley set: Olivander’s Wand Shop & Scribullus placed opposite Quality Quidditch Supplies & The Daily Prophet.
Our main character, the Stormtrooper, is dressed appropriately for the age, and will be shown on foot patrol at night. More on the supporting characters later on.
Subject
I created my subject by ‘Frankensteining’ parts from three minifigures:
- Torso, legs, and truncheon from LEGO Minifigure Series 11 – the Constable
- Helmet from Stormtrooper
- Light nougat hand from random minifig
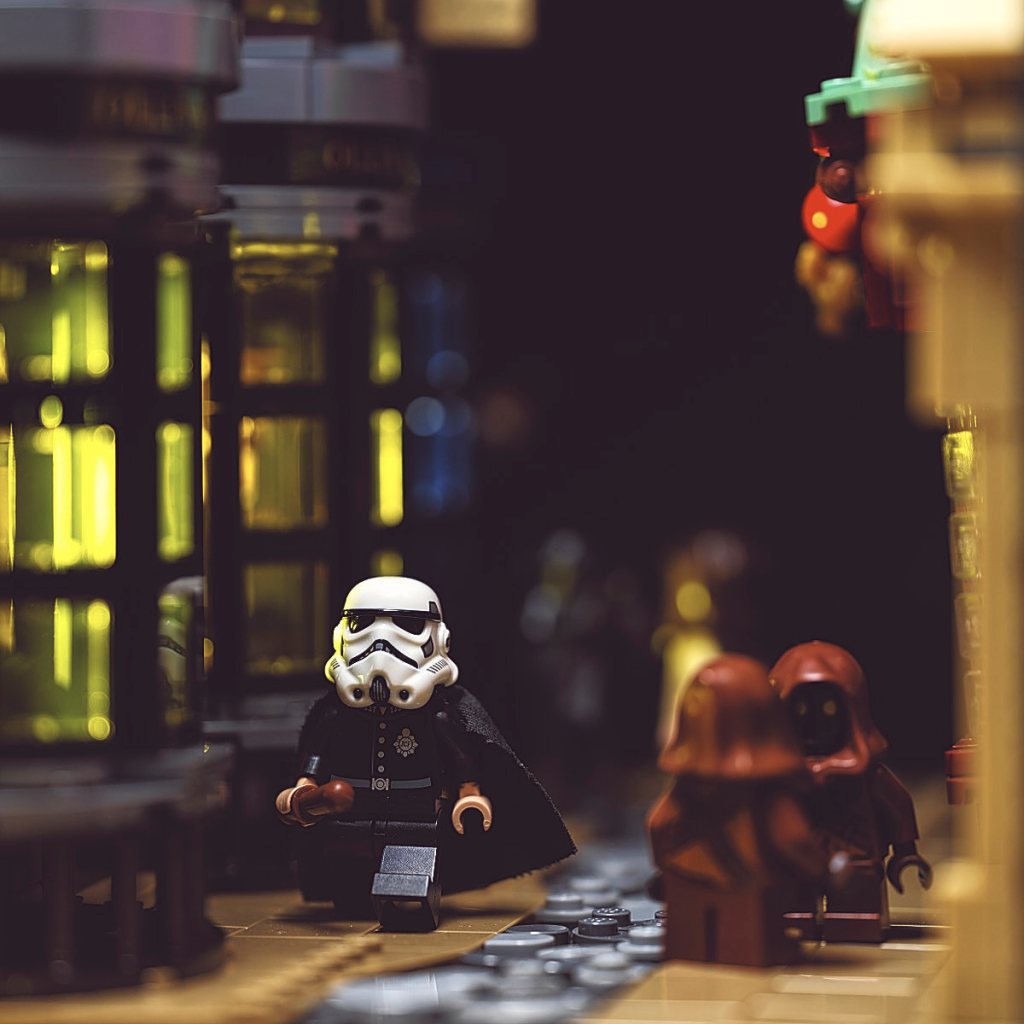
To help him stand out, I shot the scene with a 120 mm macro lens at its widest aperture: f/4. I manually focused on his face, knowing that the narrow depth of field would draw our eyes to this sharpest part of the frame. Additionally, his crisp black and white uniform contrasts with the earthy tones of the secondary figures, and he further breaks pattern as the only one in motion.
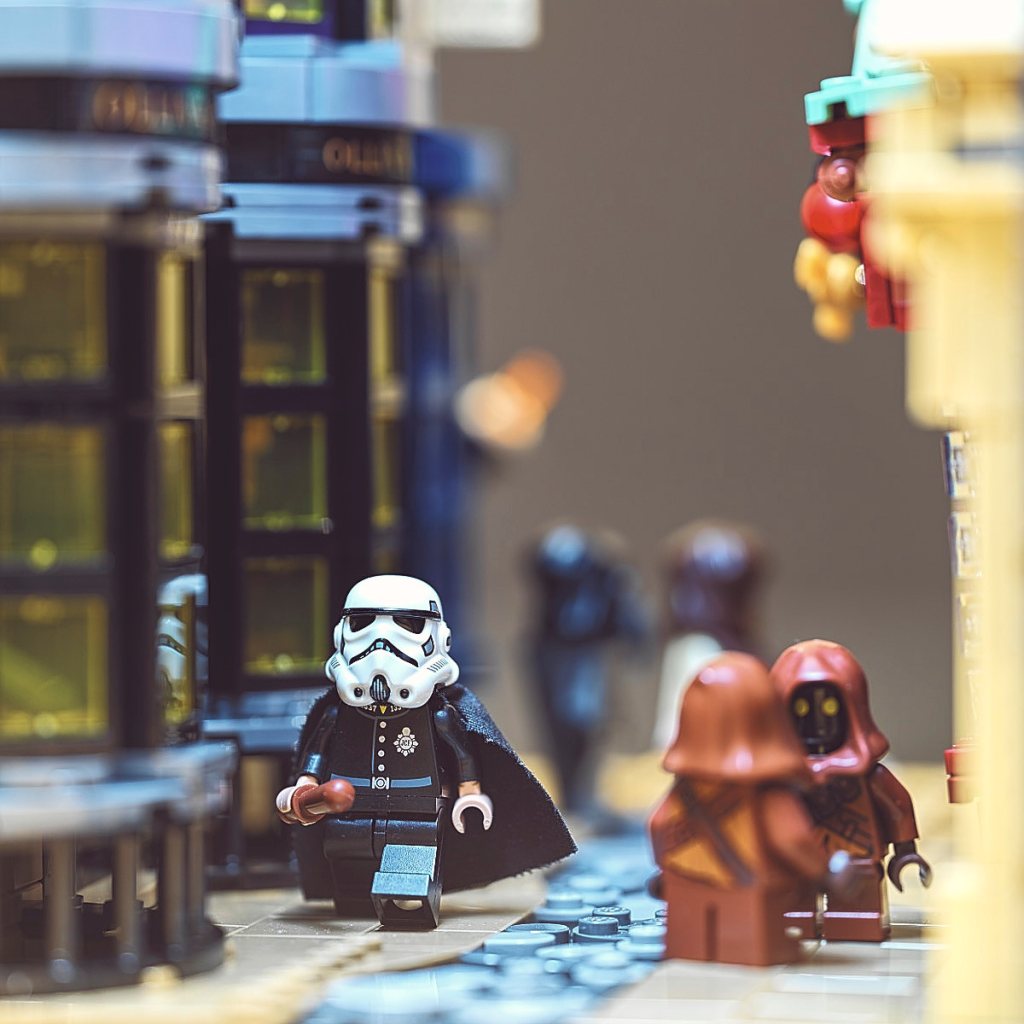
If this image looks familiar, it should – the only difference between this shot and the featured image is lighting. Let’s check that out.
Light
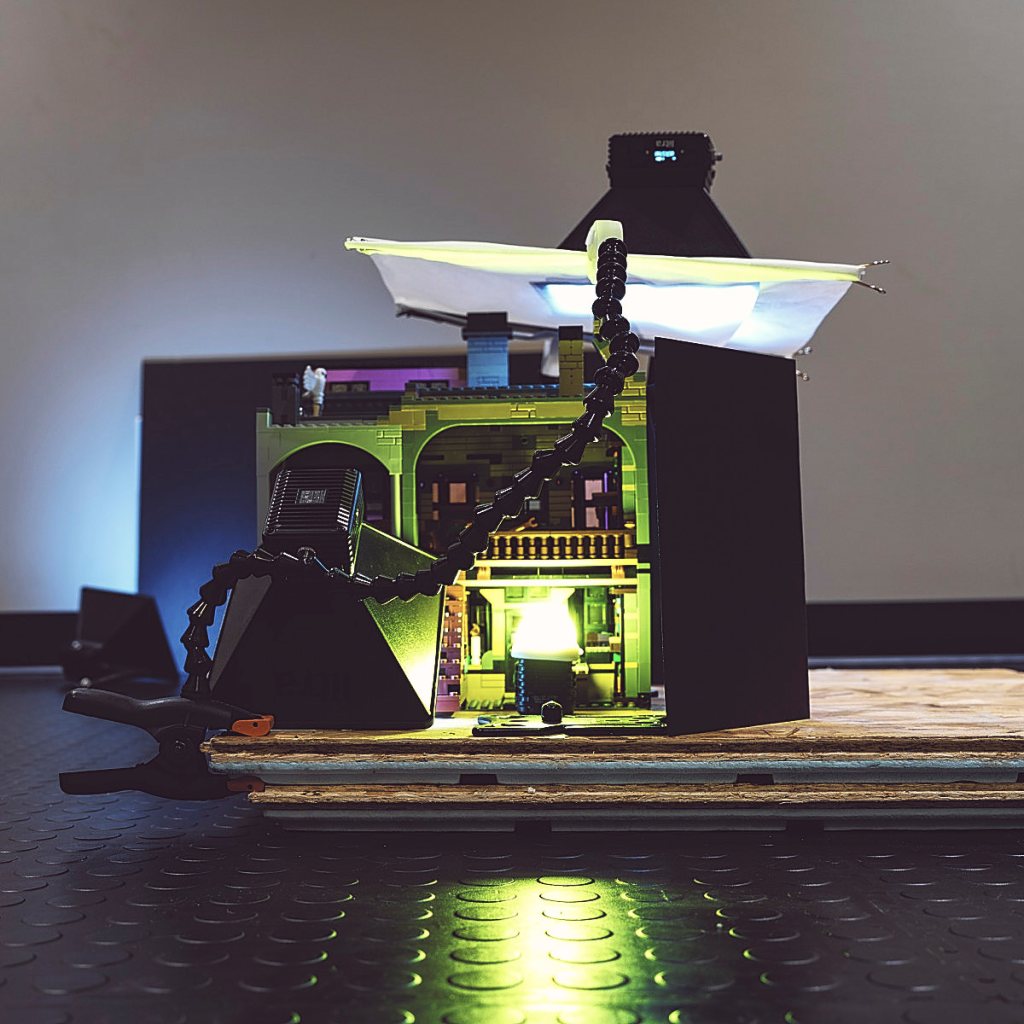
Instead of my usual one-light approach, I wanted to create a cinematic feel to this scene. My final setup involved four lights:
Key
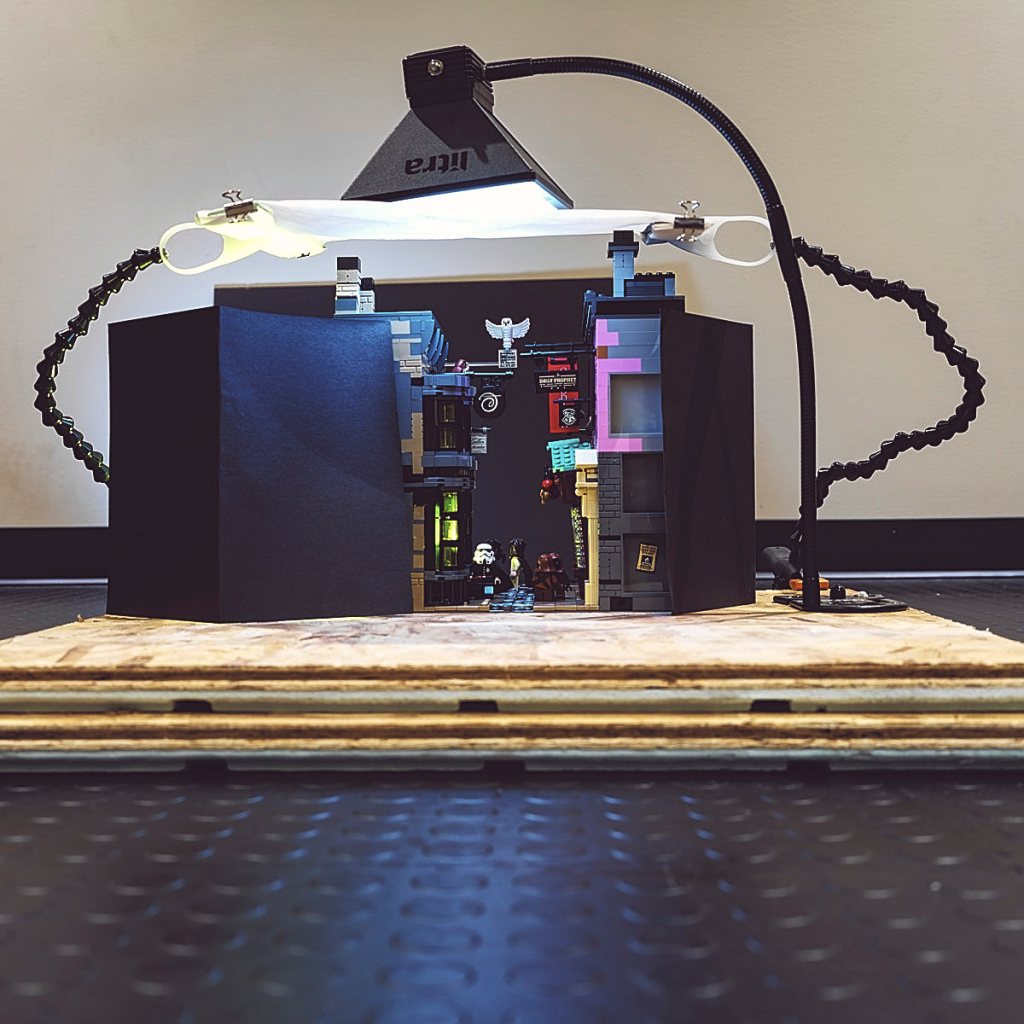
My main light was a LitraPro with softbox, positioned directly overhead the Stormtrooper to help emphasize his as the primary subject. I held it in place with gooseneck arms mounted to a Playpod Ultra, which I’ve secured to my plywood subfloor shooting base. To help soften the light, I made a DIY diffusion screen from parchment paper to increase the effective size of my light source, held in place with Wimberley Plamps. (if I had a larger softbox or octa, I would have used this). Finally, I used folded black construction paper as flagging for the fill lights.
With the ambient room light turned off, this is how the scene looked with key light only. A good start, I felt, but not as convincing or dramatic as I had envisioned.
Fill 1
Wanting to create a more realistic atmosphere, I placed a LitraTorch 2.0 with yellow filter and diffuser inside the building to the Stormtrooper’s right, so that its light would spill out through the bay windows into the street. I’ve turned the set 90 degrees here for a better look.

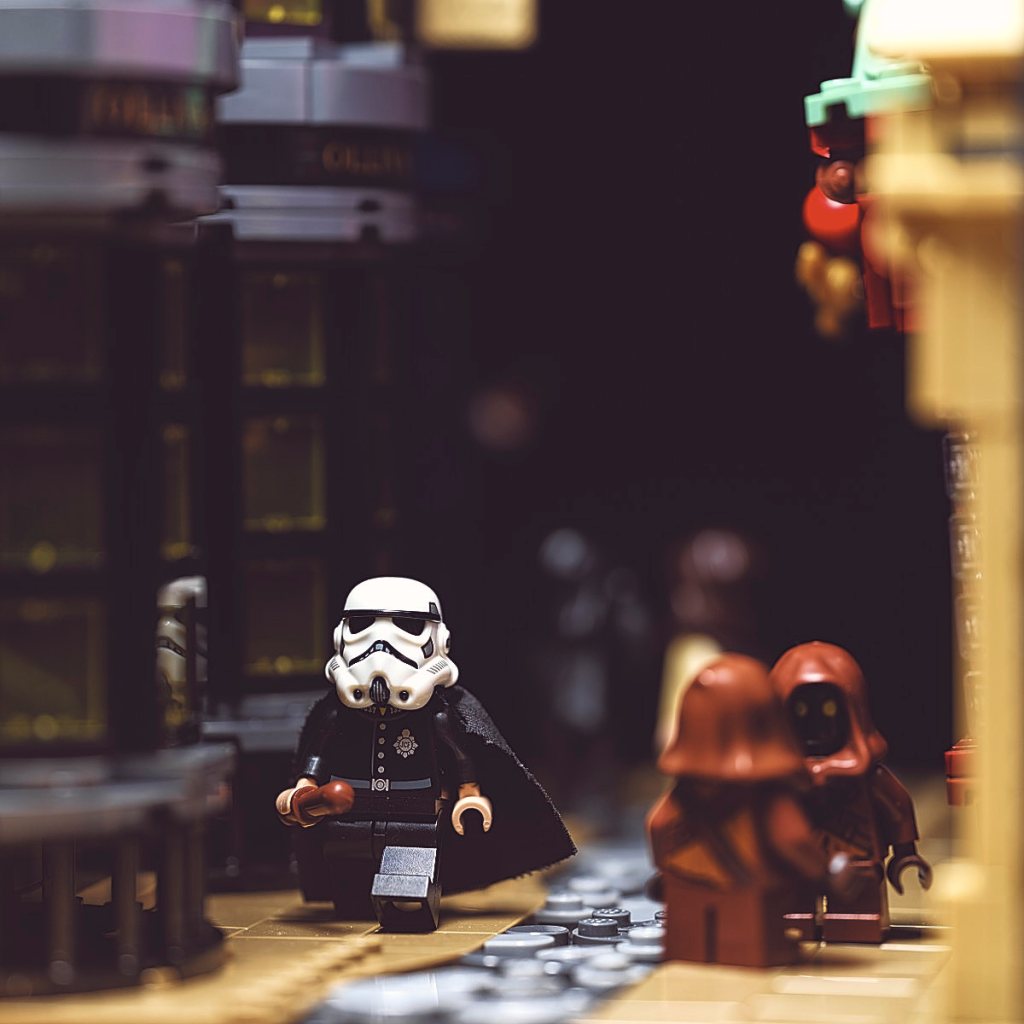
This is the resulting atmosphere. I avoided harsh reflections on the Stormtrooper by placing him abeam the doorway between the two light-filled windows, with the door acting as a flag blocking direct light on him.
Happy with this, I turned my attention to the background.
Fill 2
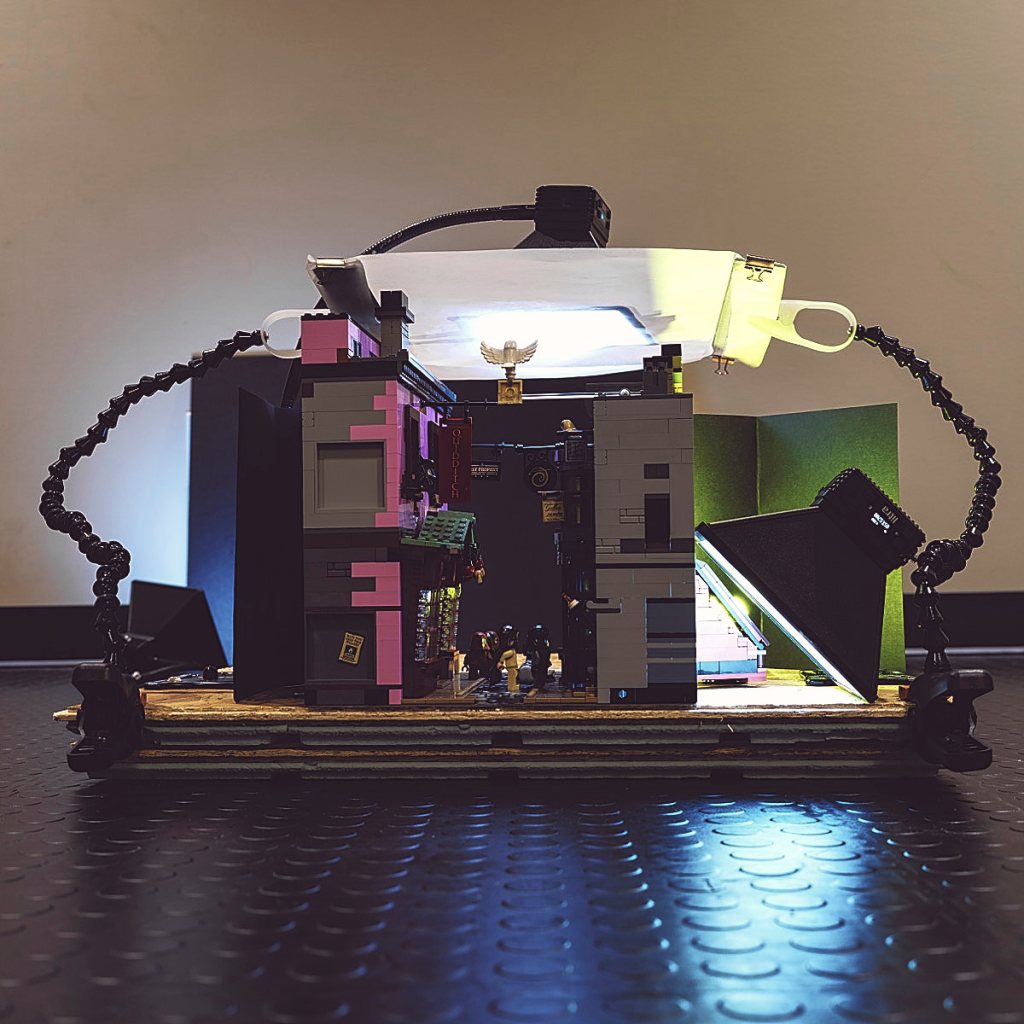
Another 90 degree turn of the set shows my second fill light, another LitraPro with softbox, leaning against the building to bounce light off the floor and through the next set of windows for a soft glow.
The reflections on the blue window casements are subtle, but I nonetheless saw this as important element of the photo, given that blue and yellow are complementary colours that create a natural contrast that our eyes find attractive and intriguing.
Background
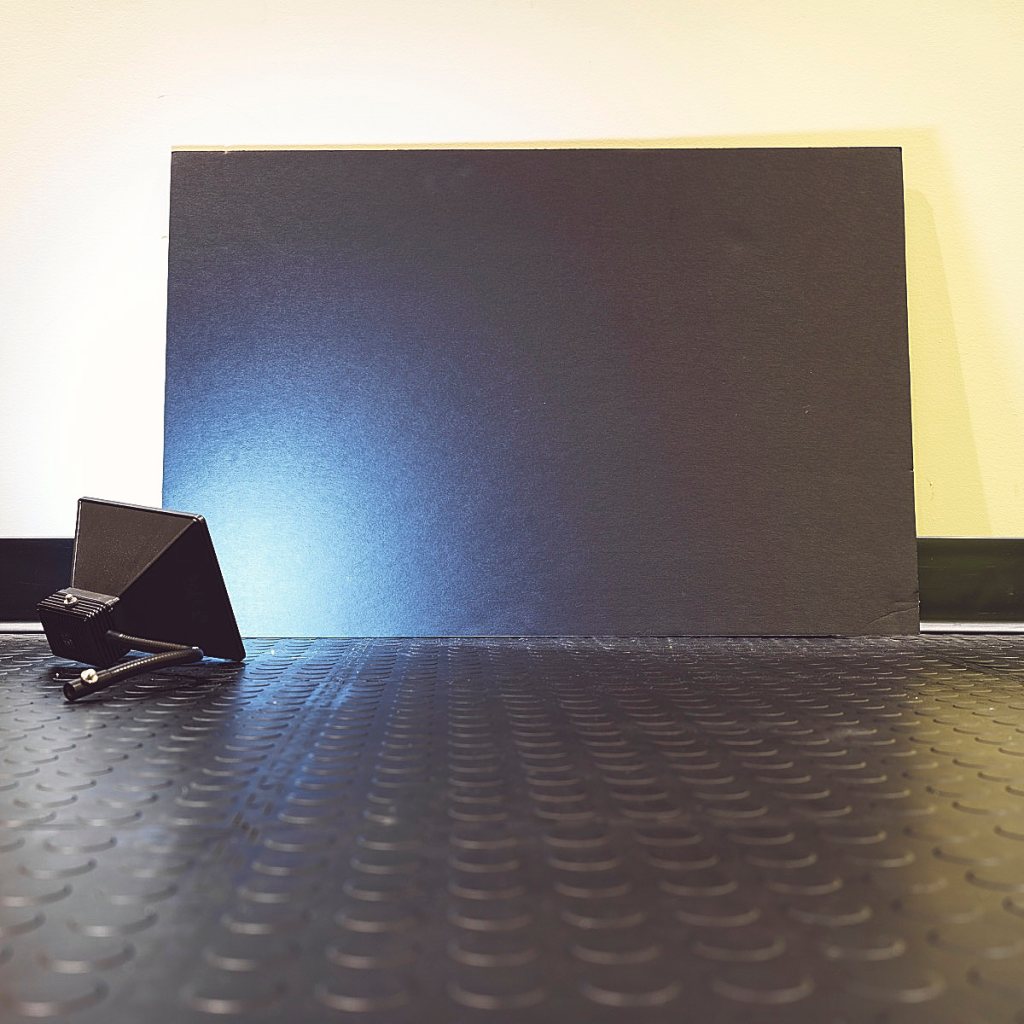
To help with creating a dramatic night scene, I aimed my last LitraPro with softbox at the bottom corner of my black foam core background.
Here we see the resulting glow and light gradient, evoking nighttime fog and a little bit of mystery.
Post Processing

This is the final image. In terms of lighting effects in post production, I added a two-stop vignette to emphasize the central elements of the frame. I also added an adjustment layer for burning, adding a half stop of light on the constable’s badge and Jawa’s eyes to bring them up just a little. Finally, I cleaned up some dust speaks and cleaned up distracting highlights on the Jawa and the cloaked figure in the rear (Obi-Wan Kenobi, by the way).
Composition

To help draw our eyes to the subject, I used the rule of thirds to place him within the frame. Similarly, I placed the Jawas beside him to help establish the Mos Eisley context.

Wanting to emphasize building height, I kept the secondary anonymous cloaked figures in the bottom half of the frame. I also left the top right quadrant largely empty to leave some negative space, balancing the subject in the bottom left.
Conclusion
So that’s it. From the original idea, to creating and emphasizing the subject, to building atmosphere with lighting, and to putting it all together within the frame – this is how I create my work. I hope you found this interesting and of use – feedback welcome!
