
What a minifigure – one of my new favourites!
Fans of The Lord of the Rings will instantly recognize this dark sorcerer, Sauron’s herald and messenger. Appearing in Peter Jackson’s extended edition of The Return of the King, this character was brought to the real world in the LEGO set 79007 Battle at the Black Gate. Released in June 2013, this set was retired in January 2015 – I’ve just managed to find a new in box sealed set at a (somewhat) reasonable price.
Behind the Scenes
Based on positive feedback, I’ll share a look behind the scenes as often as I can.
I take a deliberate approach to the creative process behind my LEGO photography, and consider four fundamental things before I even pick up my camera:
- The Idea
- Light
- Subject
- Composition
The Idea

I wanted to show The Mouth of Sauron striding across Mordor’s shadowed wasteland. To build my scene, I used a piece of charred cedar as a floordrop and a large piece of black foam core as background.
Light
I wanted to create a low key image full of drama, drawing attention to the subject while letting the remainder of the frame fall into shadow.
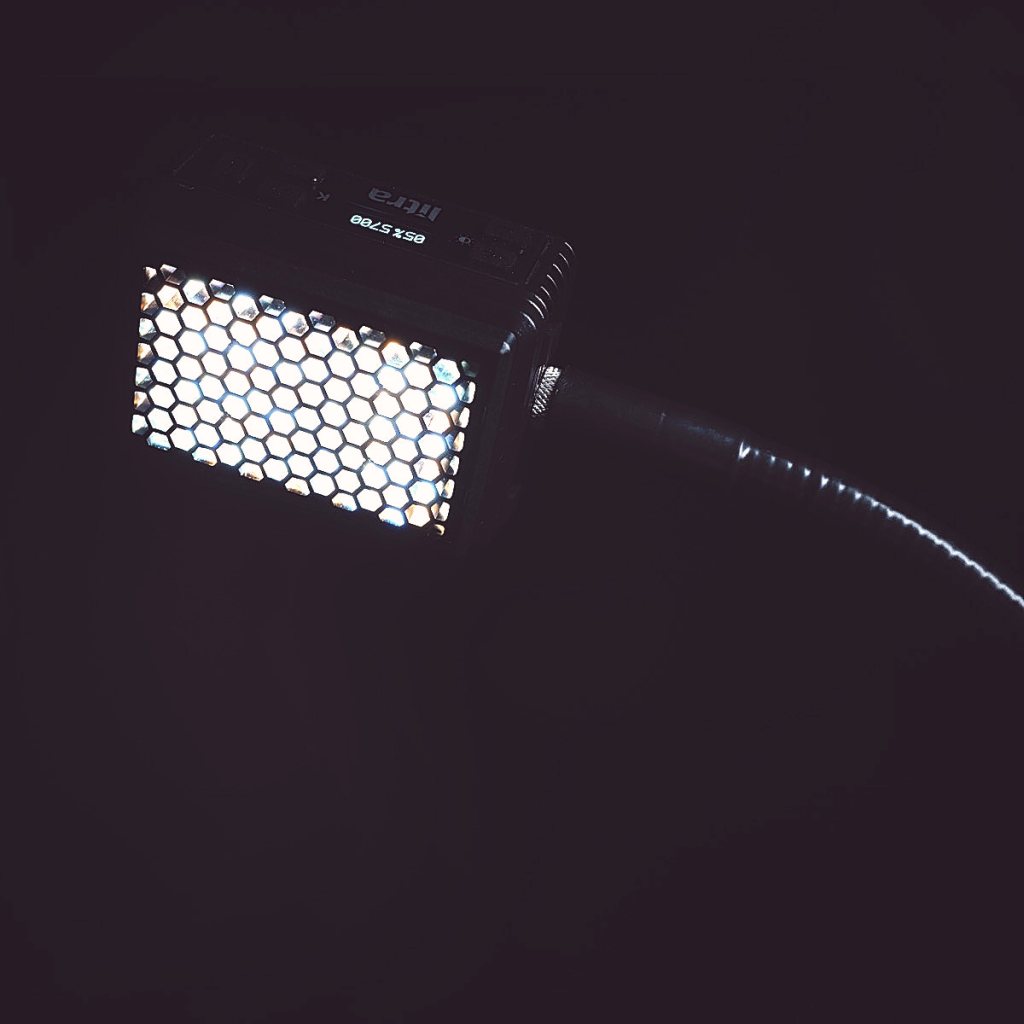
I used a single LitraPro with honeycomb grid, creating hard light with defined shadows while also controlling spill.
Subject
In order to add a little bit of life to the minifigure, I chose to show my subject in motion across the frame, wielding a sword while looking off in the distance. Given my low key photography approach, and with my light aimed to emphasize his helmet, subject isolation was simple – everything else was dark!
Composition
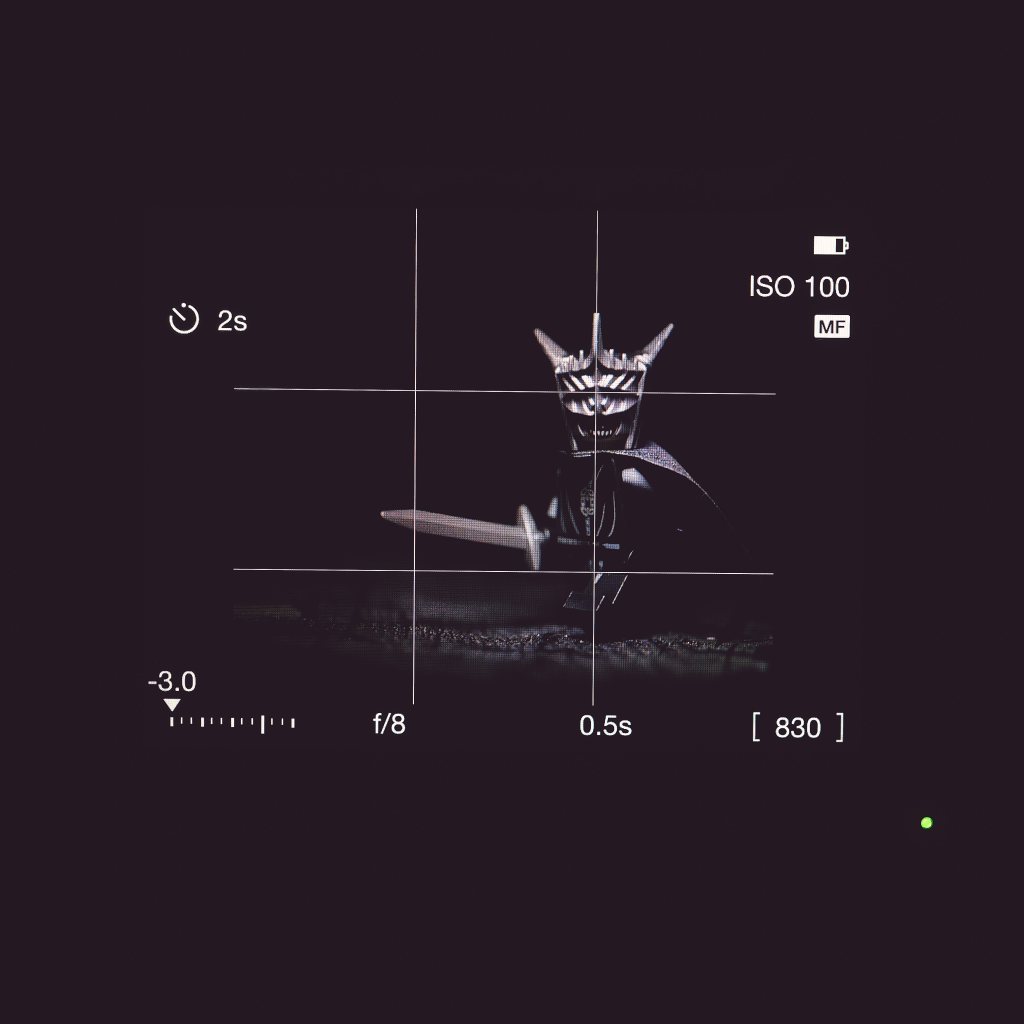
This is an image of my camera’s live view just before I took the picture. Since I display my images in square format, I use a 1:1 crop mask and grid overlay while shooting to help me compose as precisely as I can. You can see that I used the rules of thirds in placing my subject, with his eyes being the point of interest.
As for as the technical details of the shot, my LEGO photography standard operating procedure is as follows:
- Tripod mounted mirrorless camera triggered with 2 second delayed shutter (this minimizes vibration and helps ensure image sharpness)
- Camera set to ISO 100 to minimize image noise
- 120mm macro lens shot at f/8 and manually focused using magnified live view (this provides an optimum balance of depth of field and sharpness, while avoiding image degradation from diffraction effects)
- Aperture priority centre-weighted metering with exposure compensation to taste (you can see I used -3 EV to avoid blowing the highlights on his helmet, and to keep the scene dark).
- Post processing the RAW files with custom white balance, luma curve, saturation, contrast, sharpness, vignette, levels, and dust removal
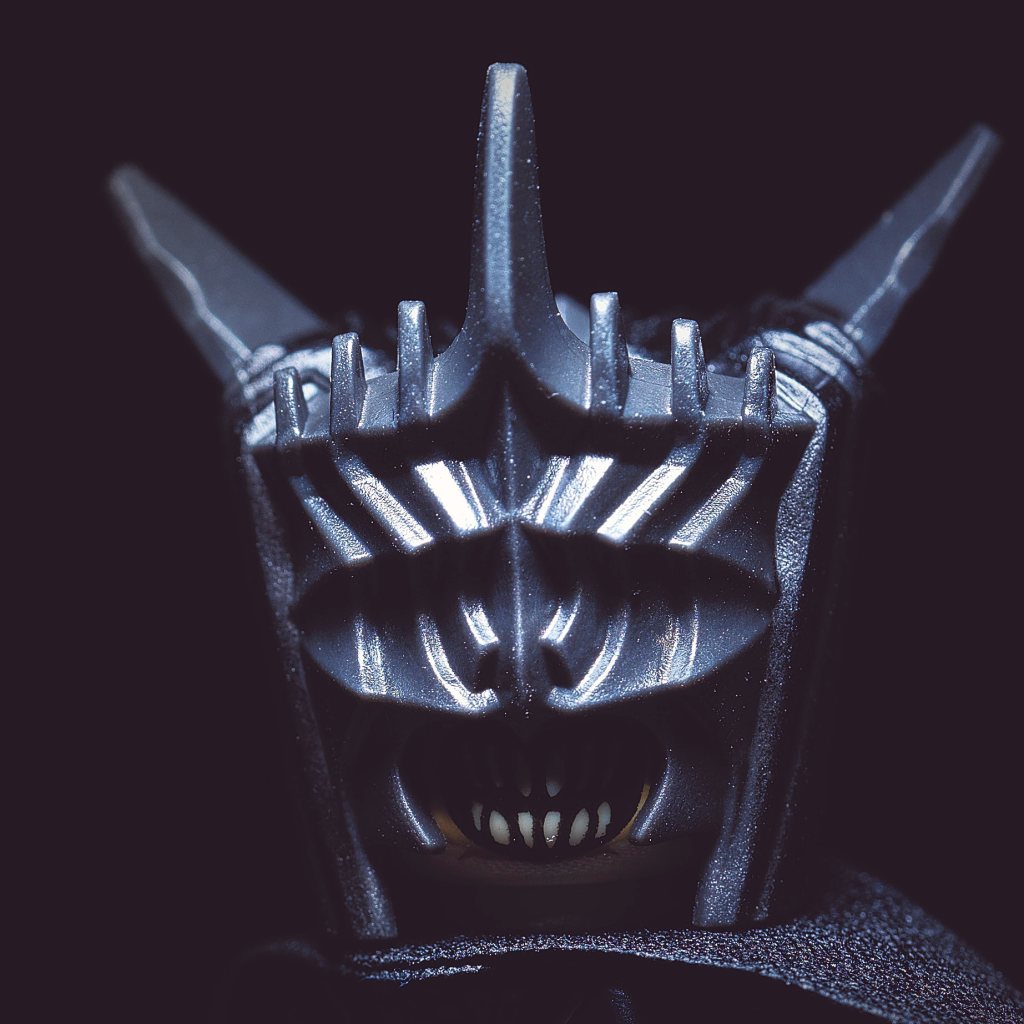
One final image: a tight crop showing just how unforgiving hard light can be with dust.
Conclusion
That’s it – a quick look at the idea, creating drama with light, isolating the subject, and composing with care.
Cheers!
