
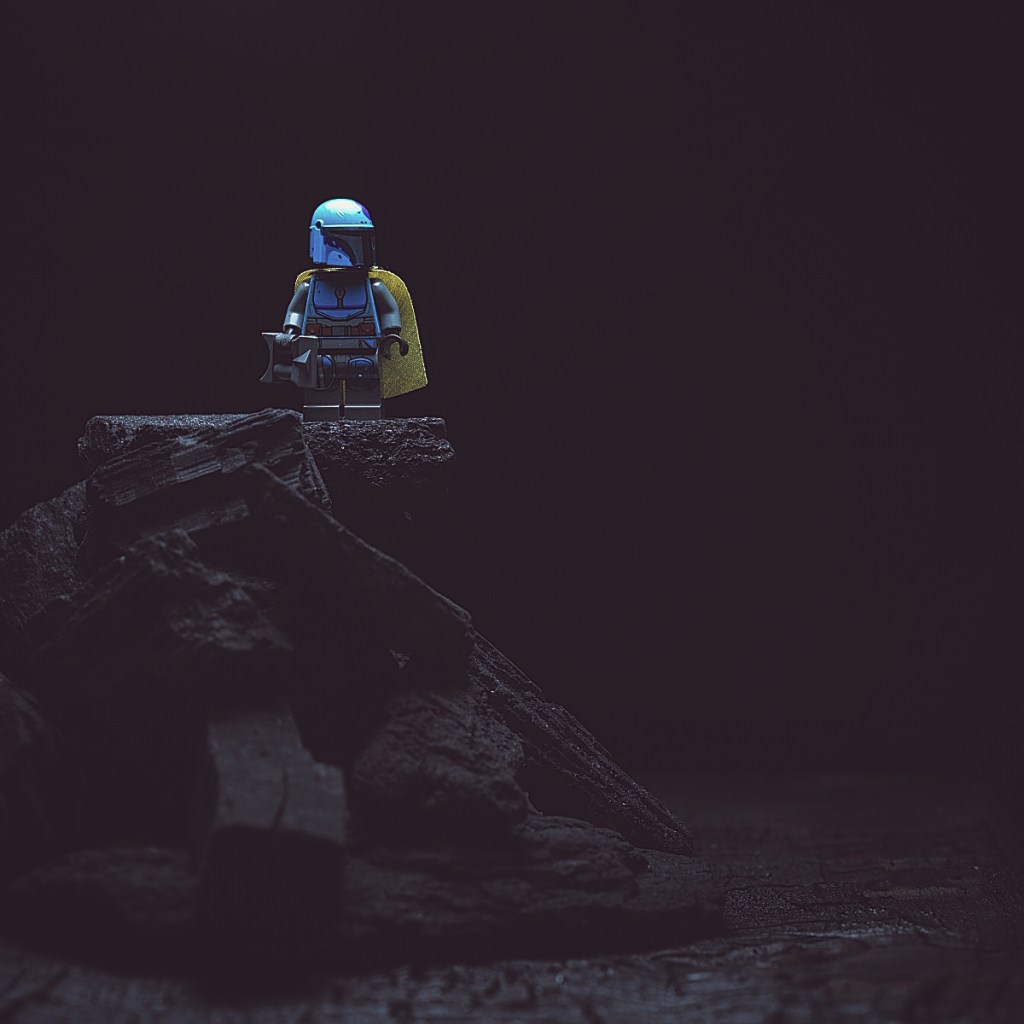
Disney’s The Mandalorian reenergized the Star Wars universe for me, and I couldn’t help but pick up the LEGO set 75267 Mandalorian Battle Pack. The set includes four tribal warriors – this photo shows the male with dark azure helmet and olive green cape. All four minifigs are wonderful and I’ll definitely be featuring the others in due course.
Behind the Scenes
With the level of technology available to today’s consumers, it’s easier than ever to take a technically competent photograph. And yet, some images clearly ‘work’ more than others.
With LEGO photography, where we can often control almost every aspect of the scene, I believe that investing time and mental energy in the creative process can help make that difference. So I’d like to share another look behind the scenes at how I considered four fundamental things in making this image:
- The Idea
- Light
- Subject
- Composition
The Idea
The idea came from a dream – a lingering vision of a lone figure perched atop rubble, gazing across a desolate wasteland into a veil of darkness.
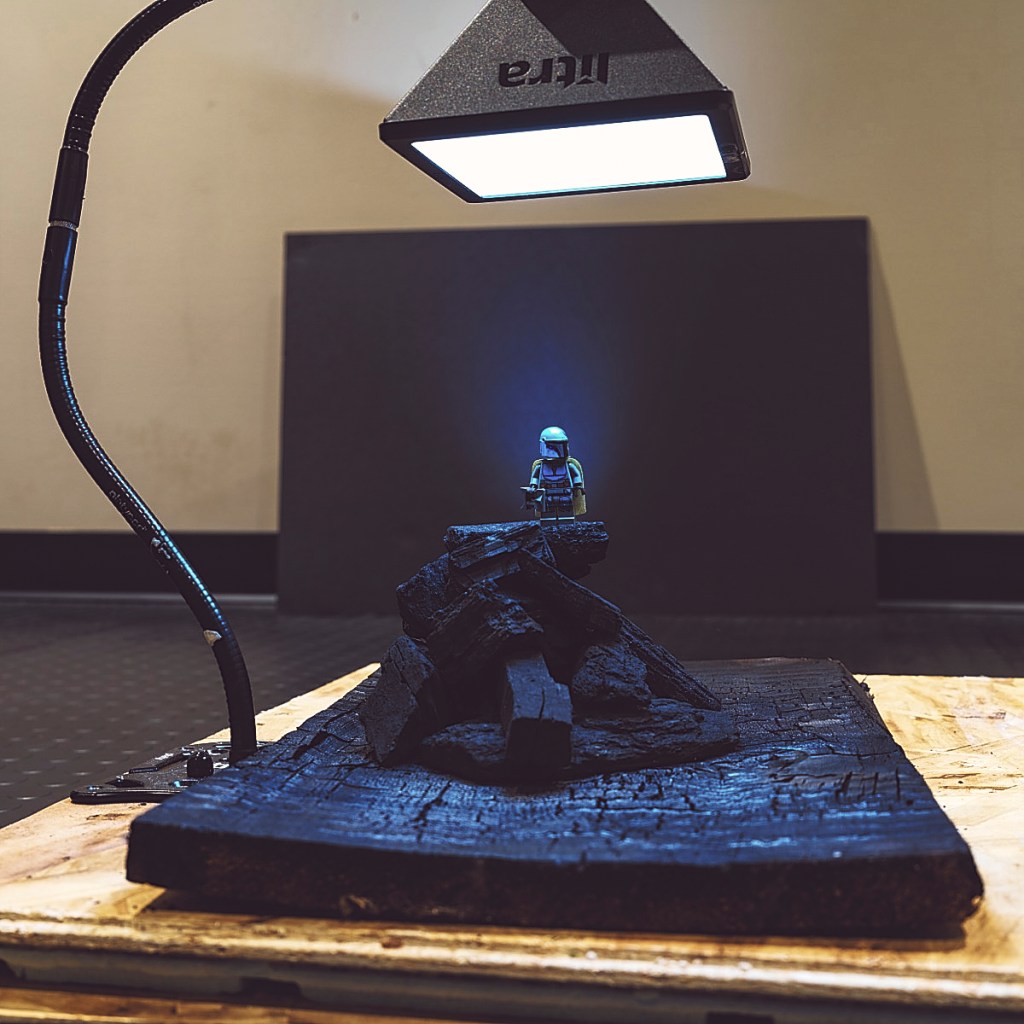
Using material at hand, I built a tor rock formation from pieces of lump charcoal, placed upon a piece of charred cedar. As usual, I have a large piece of black foam core for background.
Light
To create the image I wanted, I ended up using two lights. My main light was a Litrapro with softbox placed overhead and feathered using a pair of Platypod gooseneck arms mounted on an Platypod Ultra tripod base.
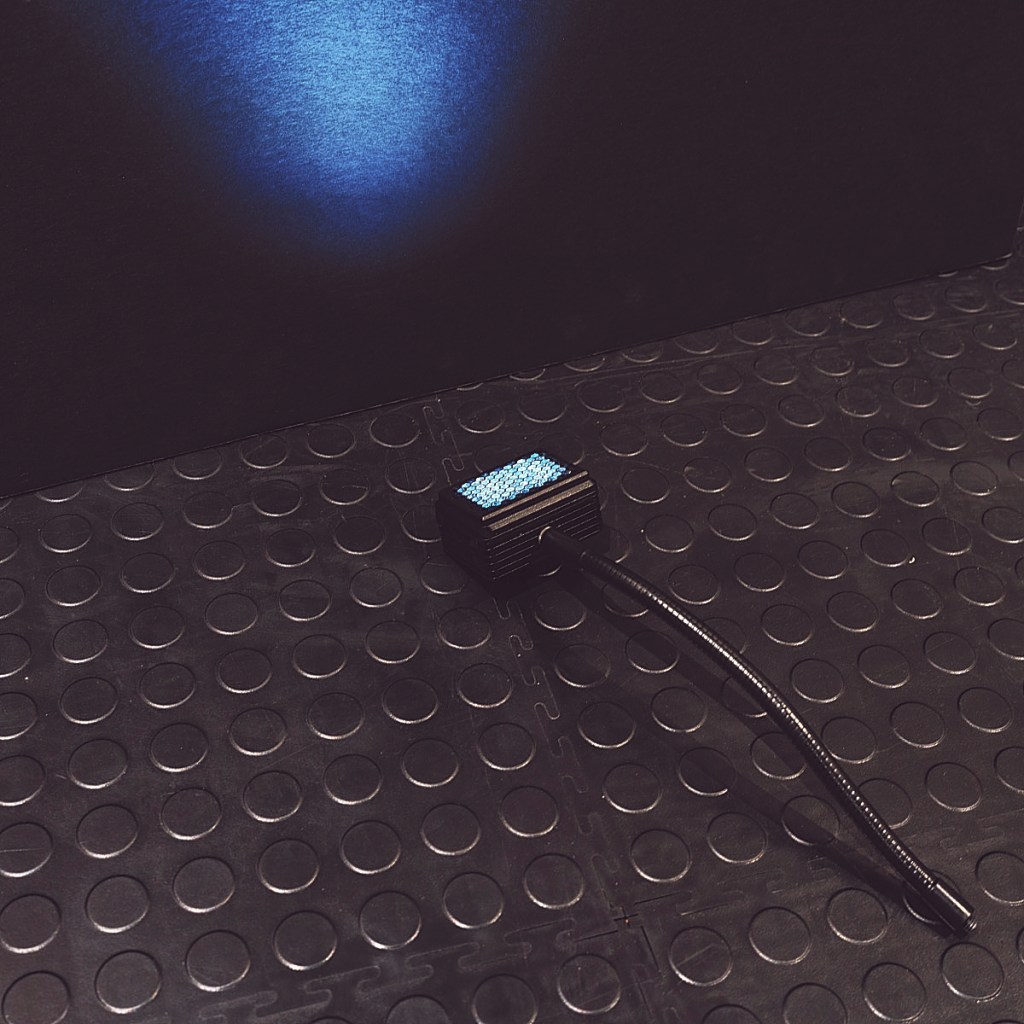
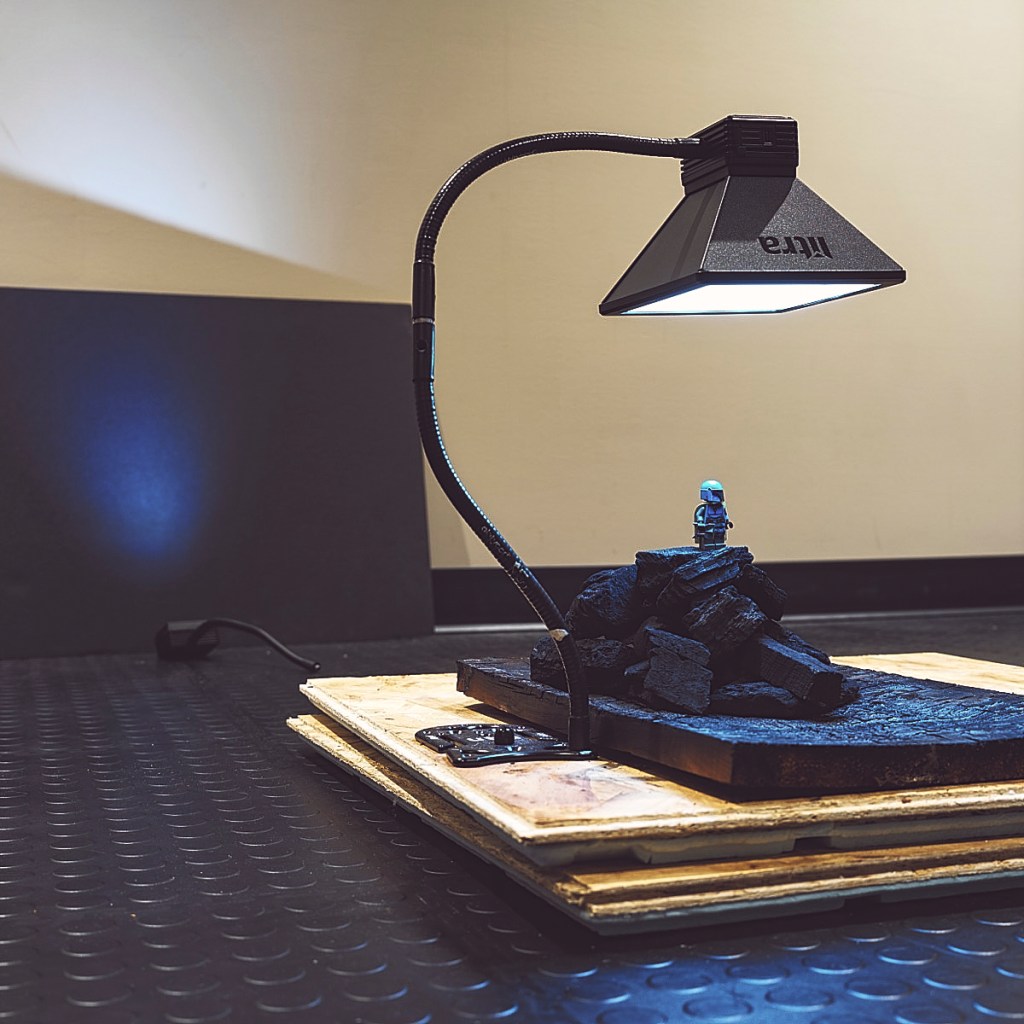
Initially I had only the one light, but as you can see just above left, the background felt lacking. So I add another Litrapro, this one with a grid to control spill, propped with a gooseneck arm to cast background light directly behind the Mandalorian.
Subject

As you can see, that second light adds a beautiful glowing column that helps emphasize the subject, while also softening the overall scene.
Of course, the smooth blue helmet and armour already contrast both in colour and texture from the surroundings, easily isolating the subject.
Composition
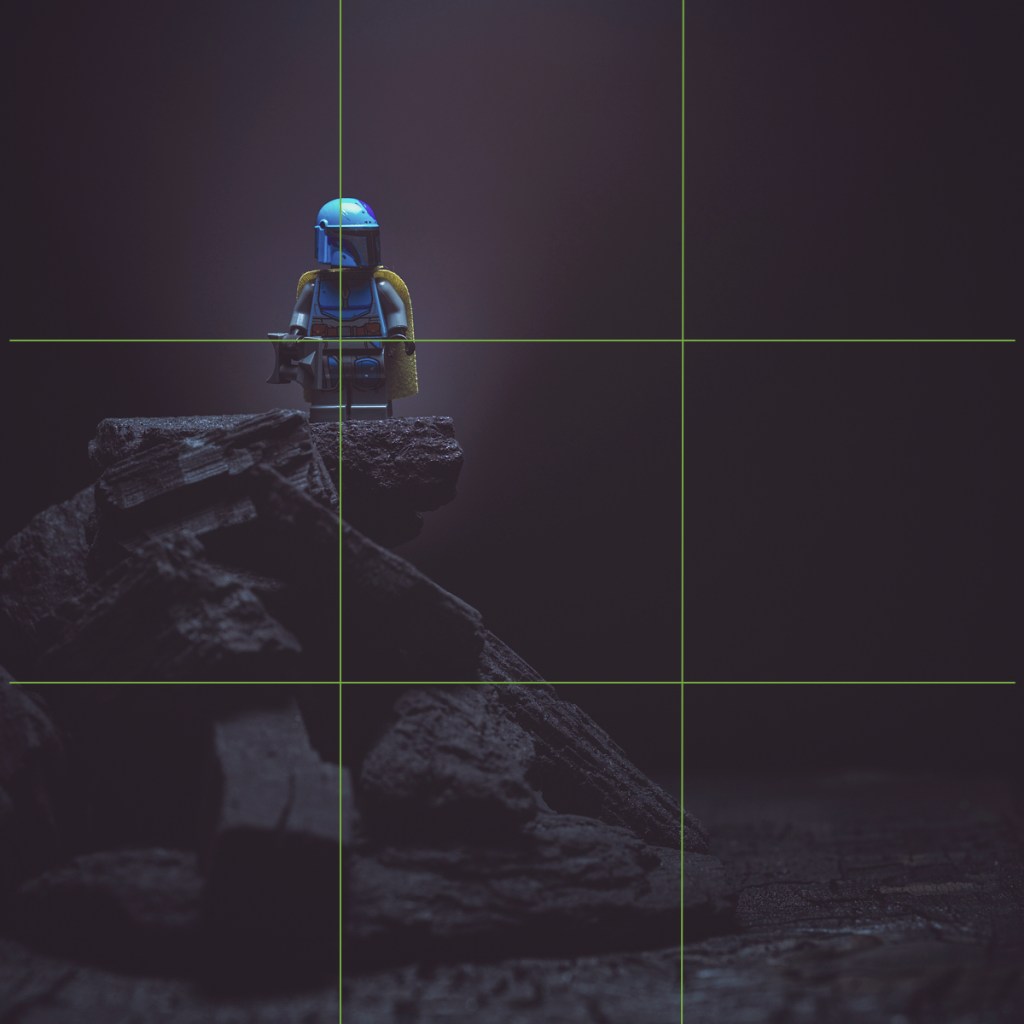
As I often do, I’ve placed the subject using the rule of thirds. Given that I wanted to created a sense of height, I shot from slightly below and pulled back as far as I could while keeping the charred cedar completely in frame.
To my eye, the diagonal slope that he is perched over adds a sense of dynamic tension, while the extensive negative space suggests emptiness beyond.
Tech Stuff
As for as the technical details of the shot, this is my LEGO photography standard operating procedure:
- Platypod Ultra mounted mirrorless camera set to ISO 100 and triggered with 2 second delayed shutter
- 120mm macro lens shot at f/8 and manually focused using magnified live view
- Aperture priority centre-weighted metering with exposure compensation to taste
- Post processing the RAW files with custom white balance, luma curve, saturation, contrast, sharpness, vignette, levels, and dust removal
Up Close and Personal

I’ve been having fun using my macro lens at its limits, so I’ve chosen to include this section in each post. If you’ve not seen one before, the only crop here is on the sides to make the image square.

Here’s a tight crop from above – you can see that the printing isn’t quite centred. Love that coloured pattern!
Wrap Up
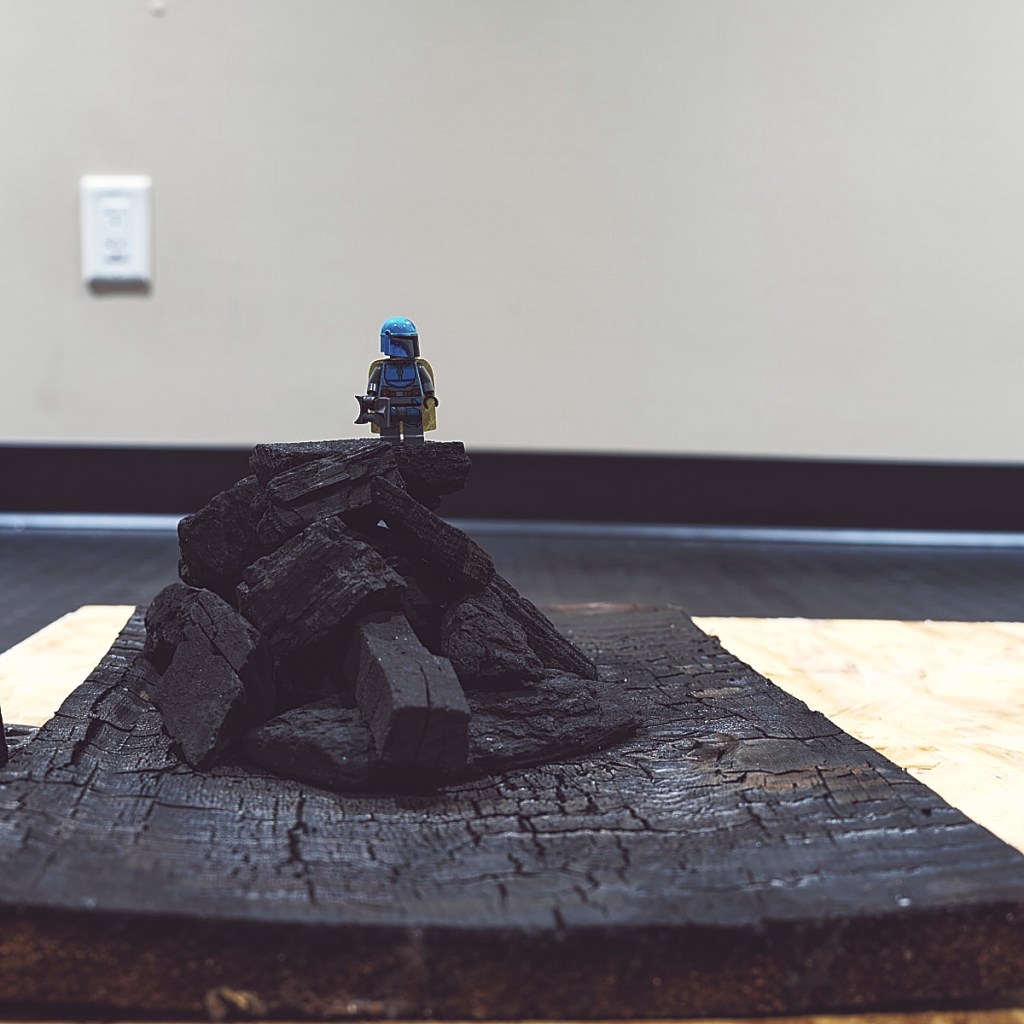

These are two photos of the scene that my idea brought to life. The difference is the combination of lighting, subject isolation, and composition. Or, put another way, the difference between making a photo versus simply taking a photo.
It’s fun to be a maker!

One thought on “This is the way”