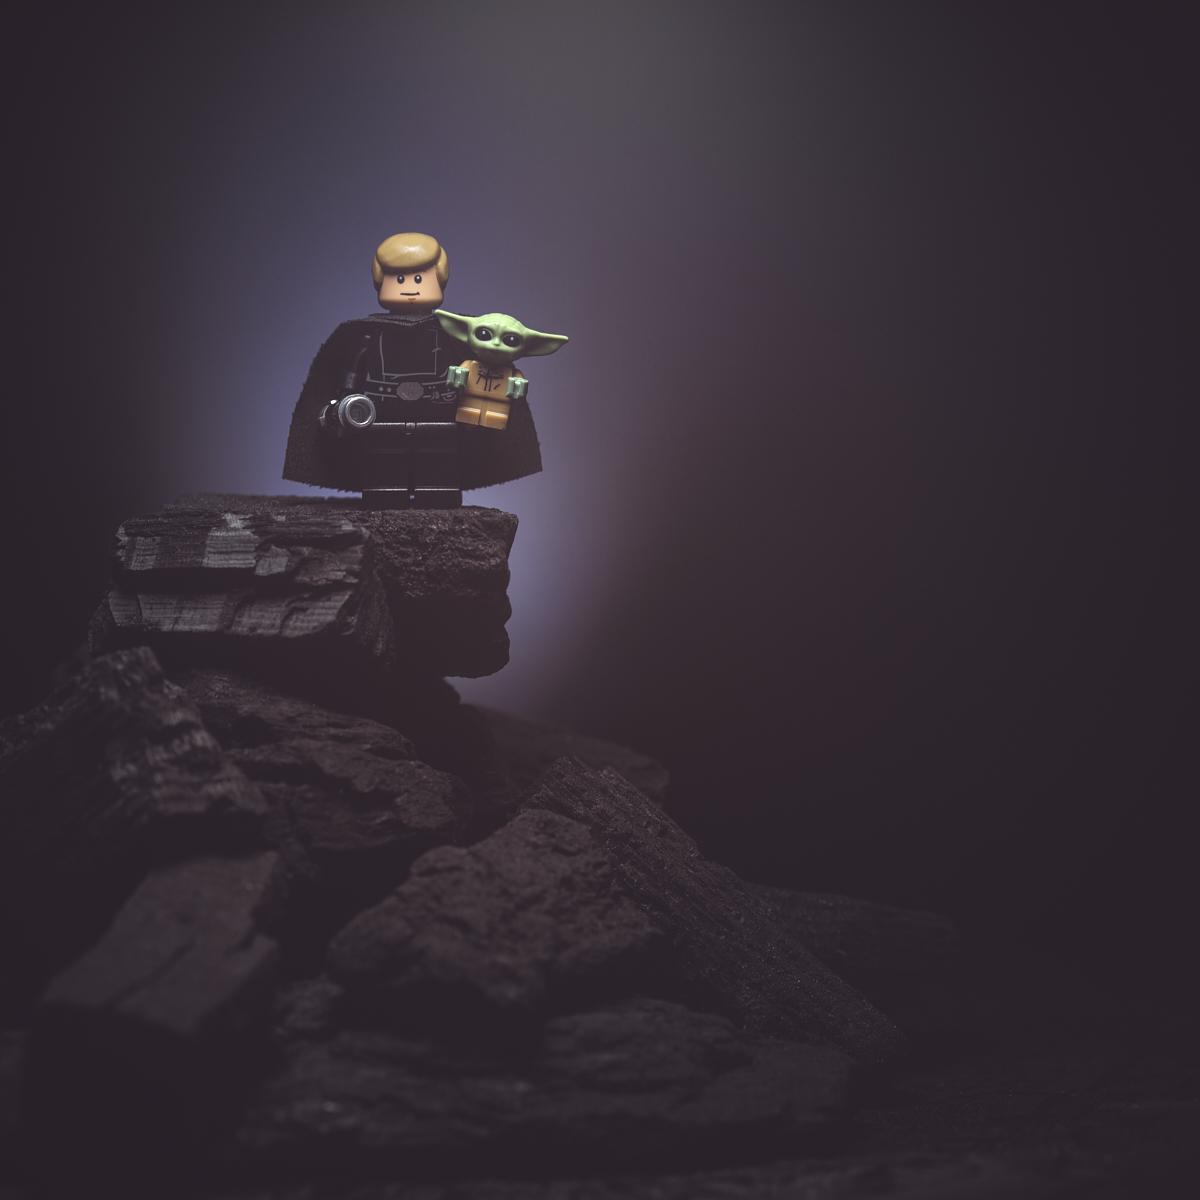
It’s Star Wars Day! And it only felt right to commemorate it with both the first and last Force-sensitive characters I was introduced to on-screen.
(plus, I can’t help but wonder where these two end up following the end of The Mandalorian Season 2…)
The Luke minifigure is borrowed from my wife’s Star Wars set 75159 Death Star – UCS, with a cape borrowed for the occasion from his dad. The Child minifigure (I don’t think he will ever be ‘Grogu’ for me) is from the newer set 75299 Trouble on Tatooine.
Behind the Scenes
With the level of technology available to today’s consumers, it’s easier than ever to take a technically competent photograph. And yet, some images clearly ‘work’ more than others.
With LEGO photography, where we can often control almost every aspect of the scene, I believe that investing time and mental energy in the creative process can help make that difference. So I’d like to share another look behind the scenes at how I considered four fundamental things in making the feature image:
- The Idea
- Light
- Subject
- Composition
The Idea
The idea came from a desire to re-use the set I built yesterday – I Iike it that much. Wanting to shoot another low key image for Star Wars Day, this version of Luke in black clothing was my preferred choice. And since the last time I saw him in this uniform was with the Child, I decided to put the two together for a dramatic environmental portrait.
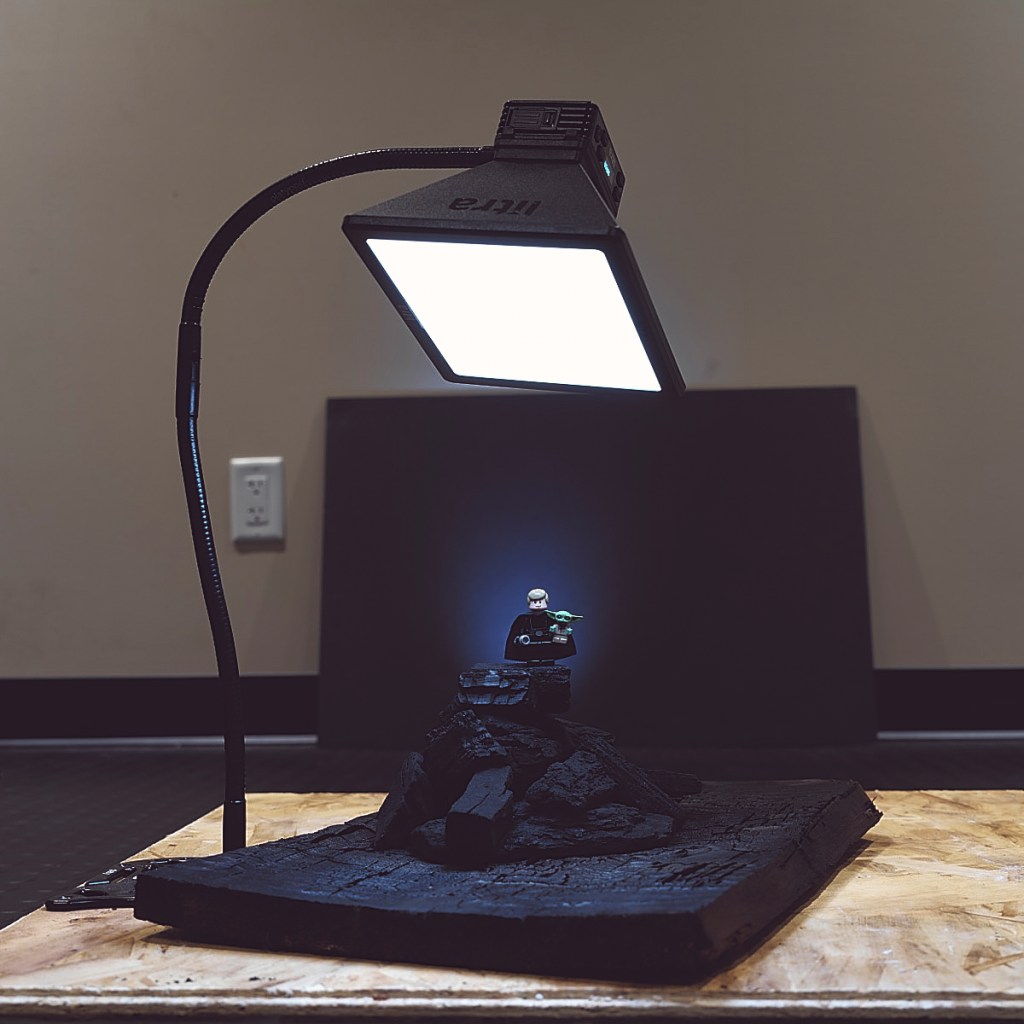
For those who may not have seen yesterday’s post, I built a tor rock formation from pieces of lump charcoal placed upon a piece of charred cedar. For background I use a large piece of black foam core.
Light
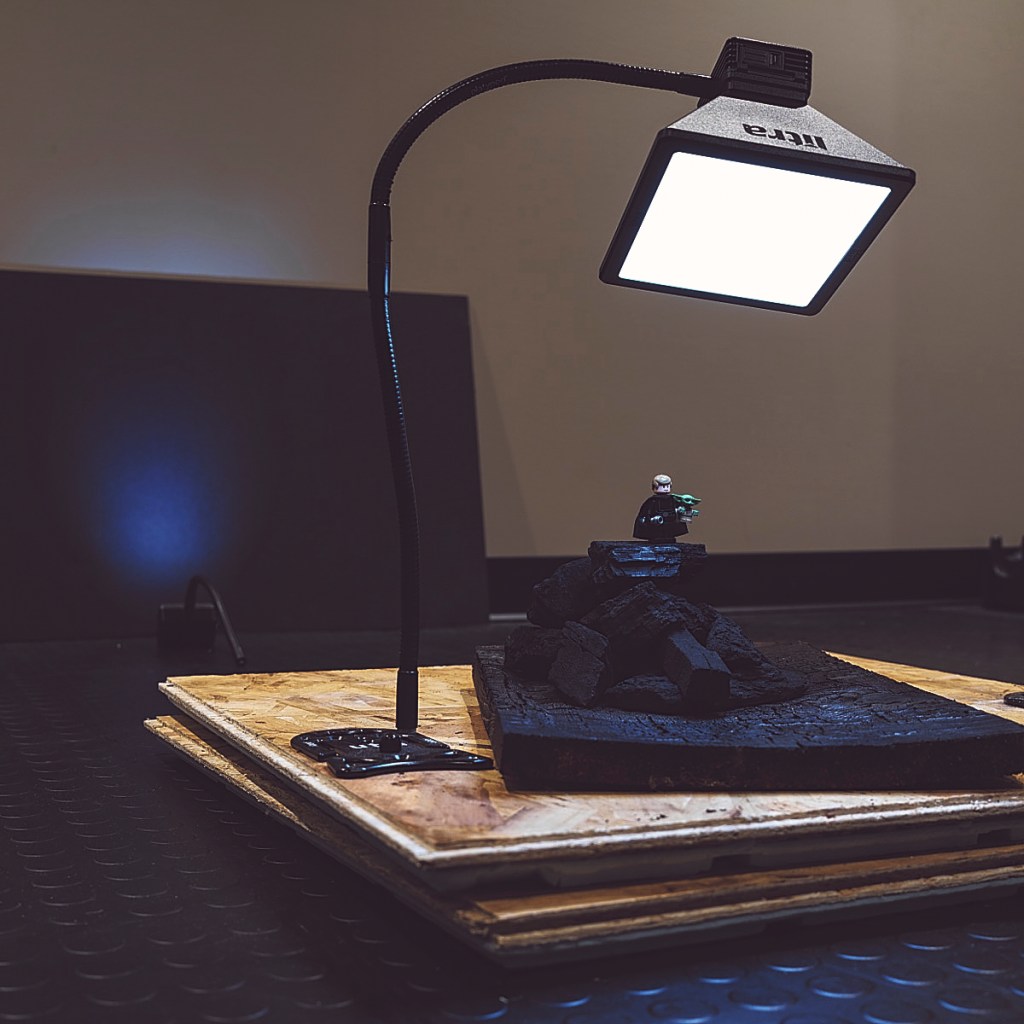
I used the same lighting setup as yesterday. My main light was a Litrapro with softbox, supported by Playtypod gooseneck arms and Ultra tripod base. The background light is another Litrapro, this one with a grid to control spill, aimed with a gooseneck arm.
Subject
Given that I considered the pair as my subject, I used tacky putty to secure the Child in Luke’s arms so that they would be seen as physically connected.
Given the dark clothing, I increase the background light intensity from what I used yesterday to help with subject isolation. I may have gone a little too far though – not sure?
Composition
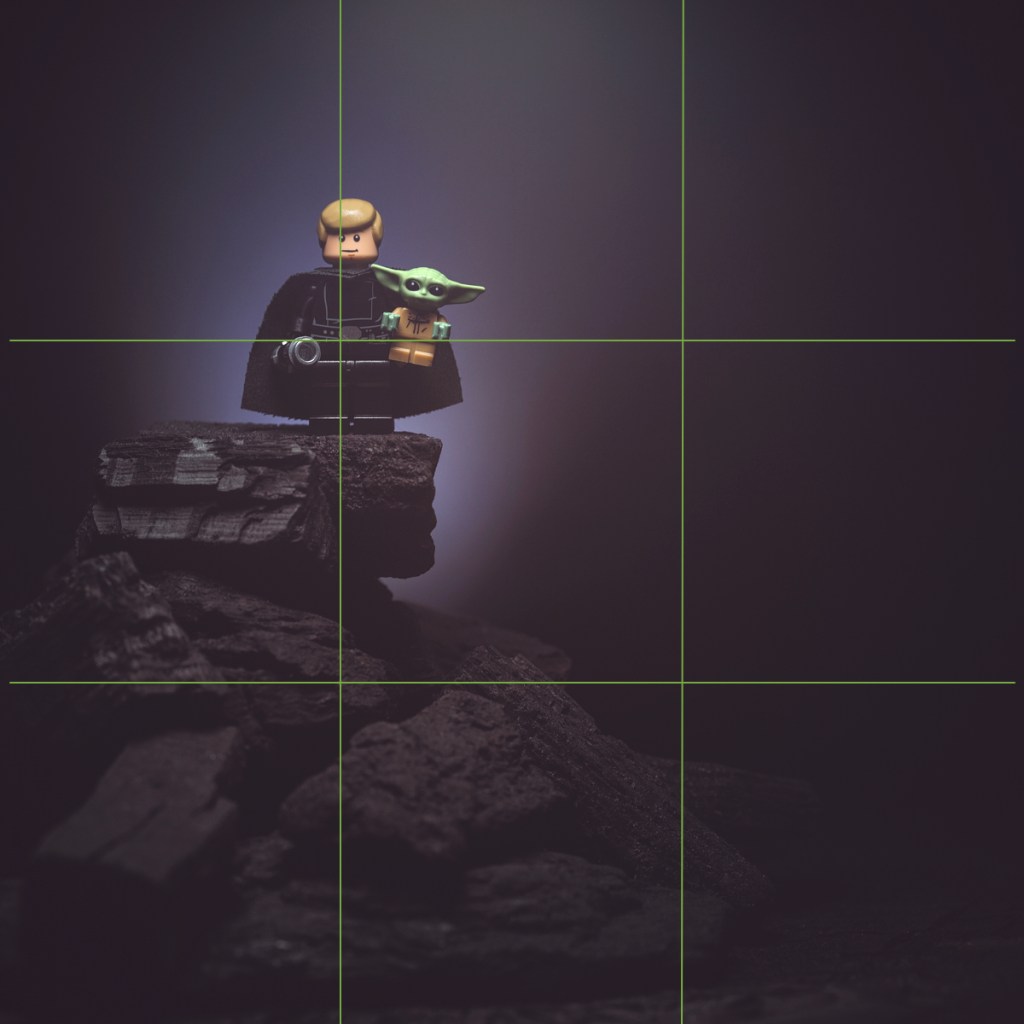
I chose a pretty straightforward composition with subject placement guided but the rule of thirds, and will ample negative space for breathing room.
Tech Stuff
As for as the technical details of the shot, this is my LEGO photography standard operating procedure:
- Platypod Ultra mounted mirrorless camera set to ISO 100 and triggered with 2 second delayed shutter
- 120mm macro lens shot at f/8 and manually focused using magnified live view
- Aperture priority centre-weighted metering with exposure compensation to taste
- Post processing the RAW files with custom white balance, luma curve, saturation, contrast, sharpness, vignette, levels, and dust removal
Up Close and Personal
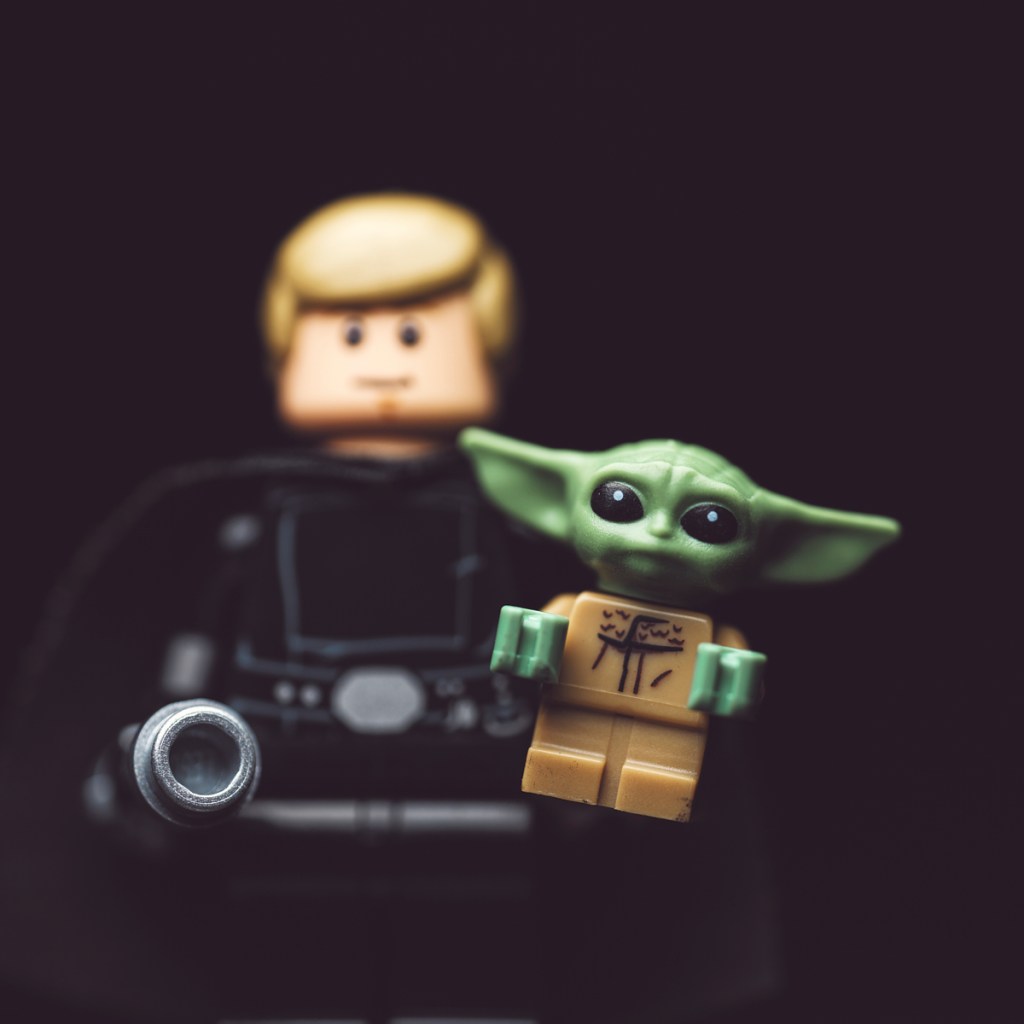
I’m not quite at minimum working distance here, but close. Just for fun, I shot wide open at f/4 – look how quickly the in-focus areas fall off.

And here’s crop from the image above. So cute!
Wrap Up


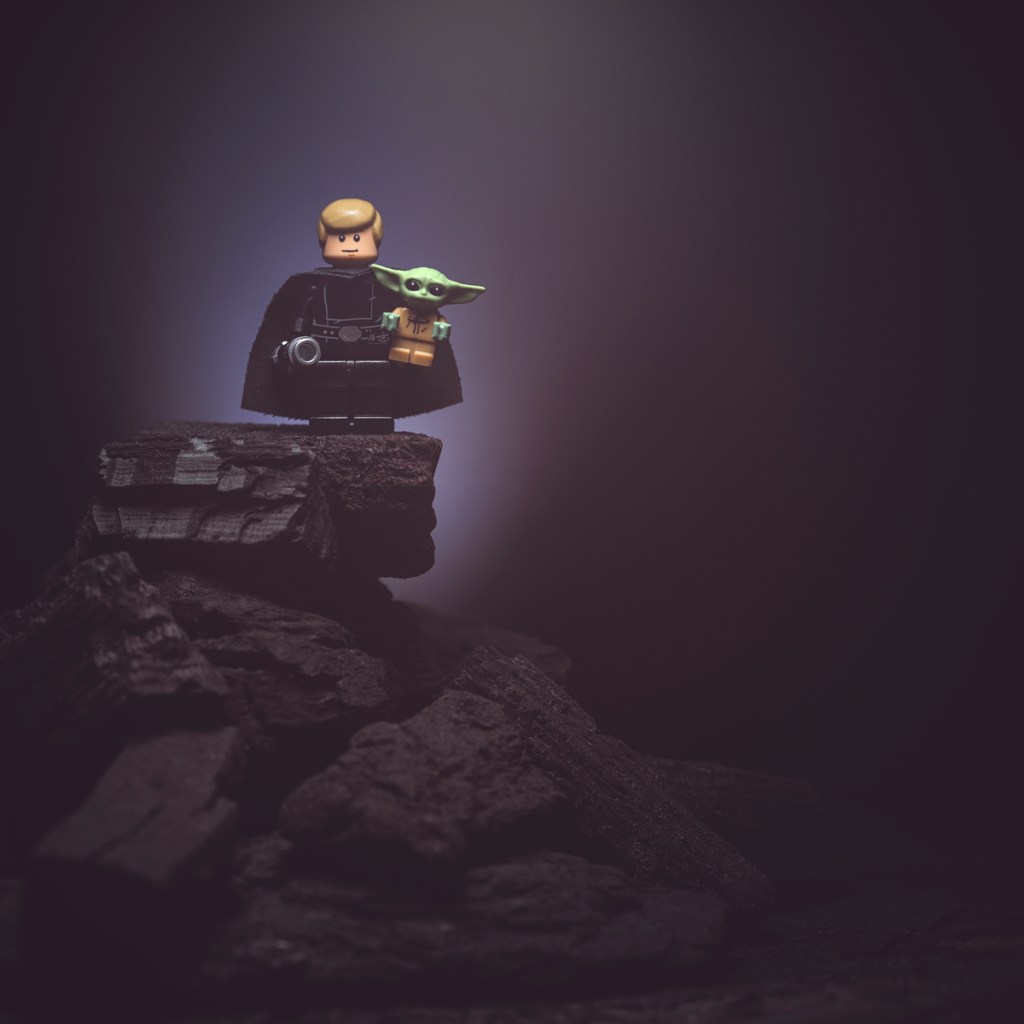
Two last photos to close with. The first is taken under ambient indoor lighting, with central framing, and automated camera settings. The second is my final image, transformed with my choices of lighting, subject isolation, and composition.
I hope you found this interesting! Let me know in the comments section if you have any questions.
Best,
Scott.
