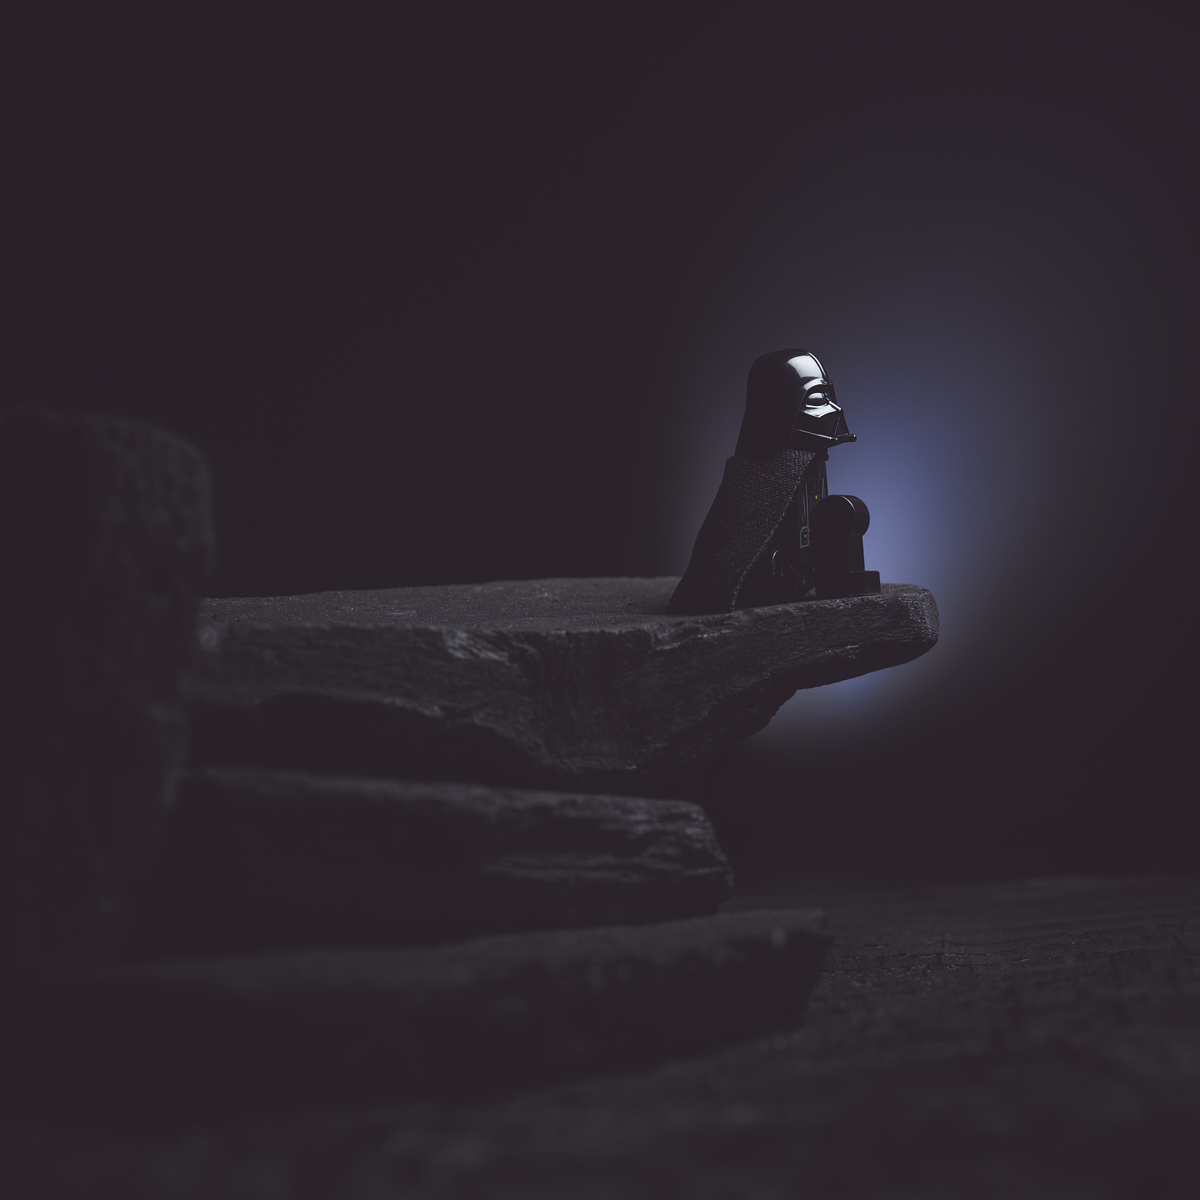
For me, it just had to be Darth Vader for #revengeofthefifth
Our LEGO collection is at the point that we can almost muster a small army of Vaders. Out of curiosity, I just took a quick look at Bricklink and saw 27 unique Vader minifigures to choose from – more than I would have guessed. The one featured in my photo is sw0636 with the two piece helmet and white scarred head, from the 2015 LEGO set 75093 Star Wars Death Star Final Duel.
Behind the Scenes
My standard preamble, so feel free to skip ahead to the next section if you’ve read one of these before:
With the level of technology available to today’s consumers, it’s easier than ever to take a technically competent photograph. And yet, some images clearly ‘work’ more than others.
With LEGO photography, where we can often control almost every aspect of the scene, I believe that investing time and mental energy in the creative process can help make that difference. So I’d like to share another look behind the scenes at how I considered four fundamental things in making the feature image:
- The Idea
- Light
- Subject
- Composition
The Idea
As a sequel to yesterday’s May the 4th Be With You post featuring Luke Skywalker and The Child, today’s post is about Darth Vader and his Sith master the Emperor.
I decided to build a scene inspired by the opening line of their holographic communication early on in The Empire Strikes Back: “What is thy bidding, my master?”.
Since I only use practical effects, and prefer a minimalist and low key style, I chose not to attempt a literal recreation of the movie scene. Instead, I wanted to create an image that simply evoked the feeling of that moment.

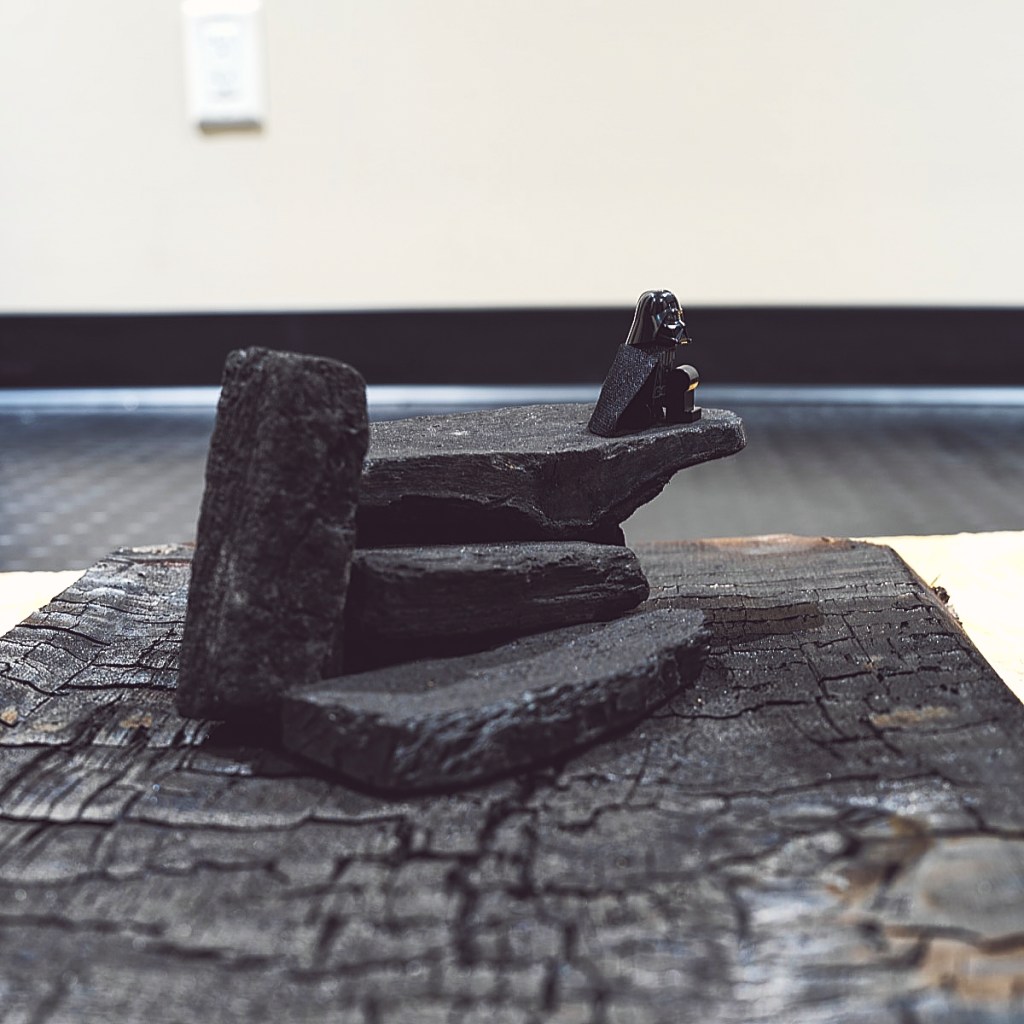
I reused pieces of lump charcoal, and a plank of charred cedar, to build a Sithish (is that a word?) altar-like structure on which to place Vader in the familiar kneeling position.
Light
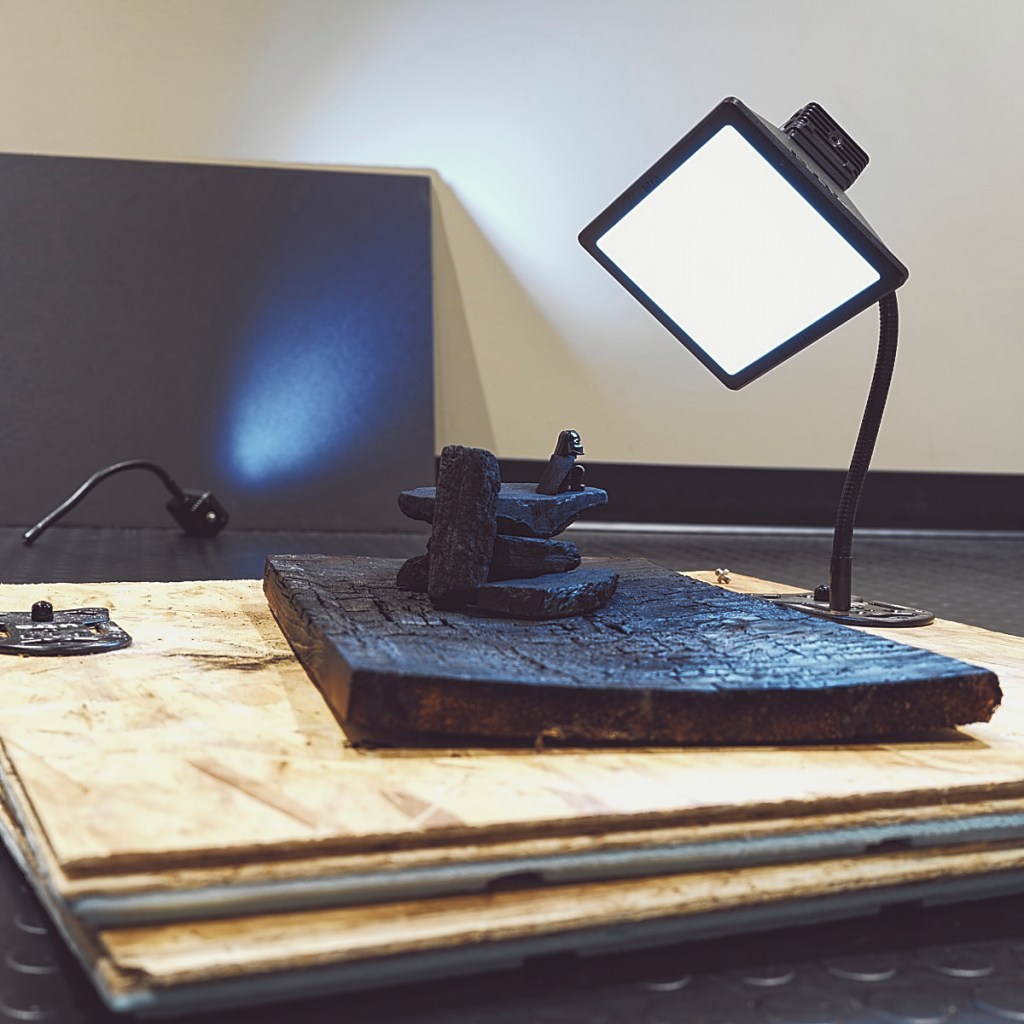
I used with a two light setup. My main light was a Litrapro with softbox placed overhead right Vader, and feathered using a Platypod gooseneck arm mounted on an Ultra tripod base. The background light is a Litrapro with grid accessory, propped in position with a gooseneck arm to shine on a large piece of black foam core.
Subject
Given that everything in the scene is black, I relied heavily on light to emphasize the subject. The main light reveals the familiar and unique Vader helmet pattern, while the background light draws our eyes to the subject and the glow creates separation between him and the background.
I chose to leave the Emperor out of frame, with only an implied presence suggested by Vader’s posture and gaze. Sometimes less is more.
Composition
I try hard to get as close to the final image as possible in camera. To help with this I compose in live view with my mirrorless camera’s rear display, with a 1:1 crop mask and grid overlay. It looks almost exactly like this:
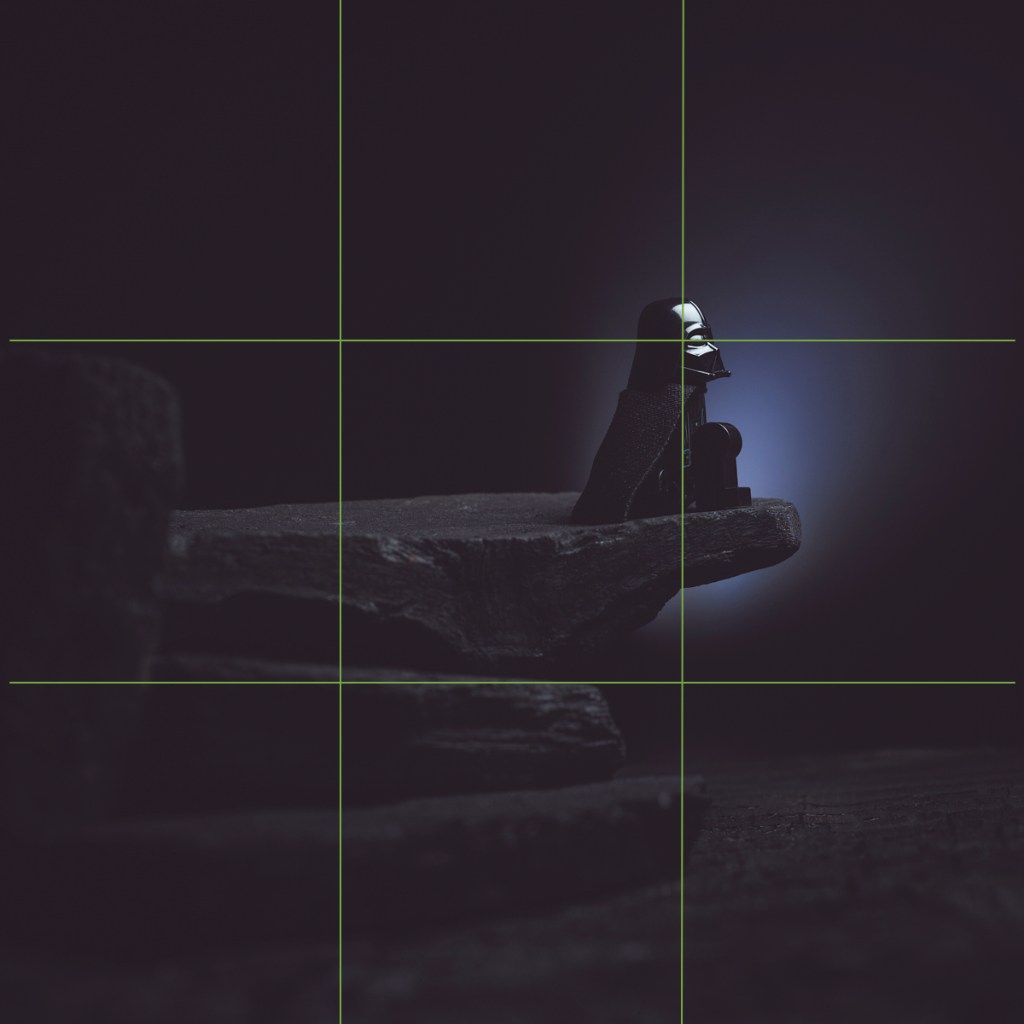
My final composition has the subject placed using the rule of thirds, and with the top third (and most of the right third) as negative space to balance the image.
I placed Vader on the right side, and looking further in that direction, to suggest a presence just out of frame. Did it work for you?
Tech Stuff
With regards to the technical details of the shot, I feel that the actual settings don’t matter for the purpose of this article. I’d rather share my standard operating procedure for LEGO photography, which can be applied to all of my shots with but few exceptions:
- Tripod mounted mirrorless camera set to ISO 100 and triggered with 2 second delayed shutter
- 120mm macro lens shot at f/8 and manually focused using magnified live view
- Aperture priority centre-weighted metering with exposure compensation to taste
- Post processing the RAW files with custom white balance, luma curve, saturation, contrast, sharpness, vignette, levels, and dust removal
Up Close and Personal

This minifigure shows Darth Vader as just after The Return of the Jedi Death Star final duel – white face, pink sunken eyes, wrinkles, and scars.
Of trivial note, this was the first minifigure to feature the Type 2 helmet style with separate top and bottom pieces. At the time of writing, this style is available on seven Vader minifigures.
Wrap Up

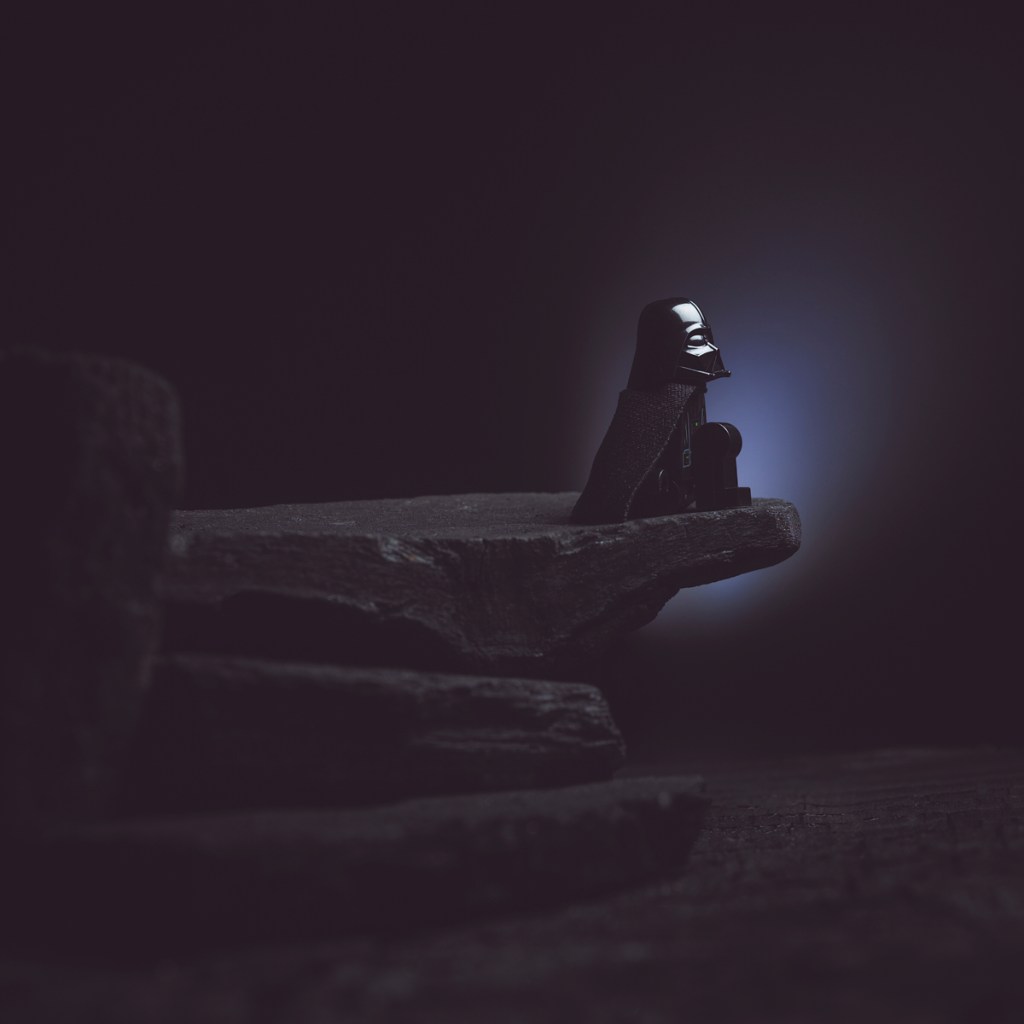
In closing, I’ll leave you with these two images side by side. The first is the generic shot of my scene and the second my final image, transformed with my choices of lighting, subject isolation, and composition.
I hope you found this interesting! Let me know in the comments section if you have any questions.
Best,
Scott.
