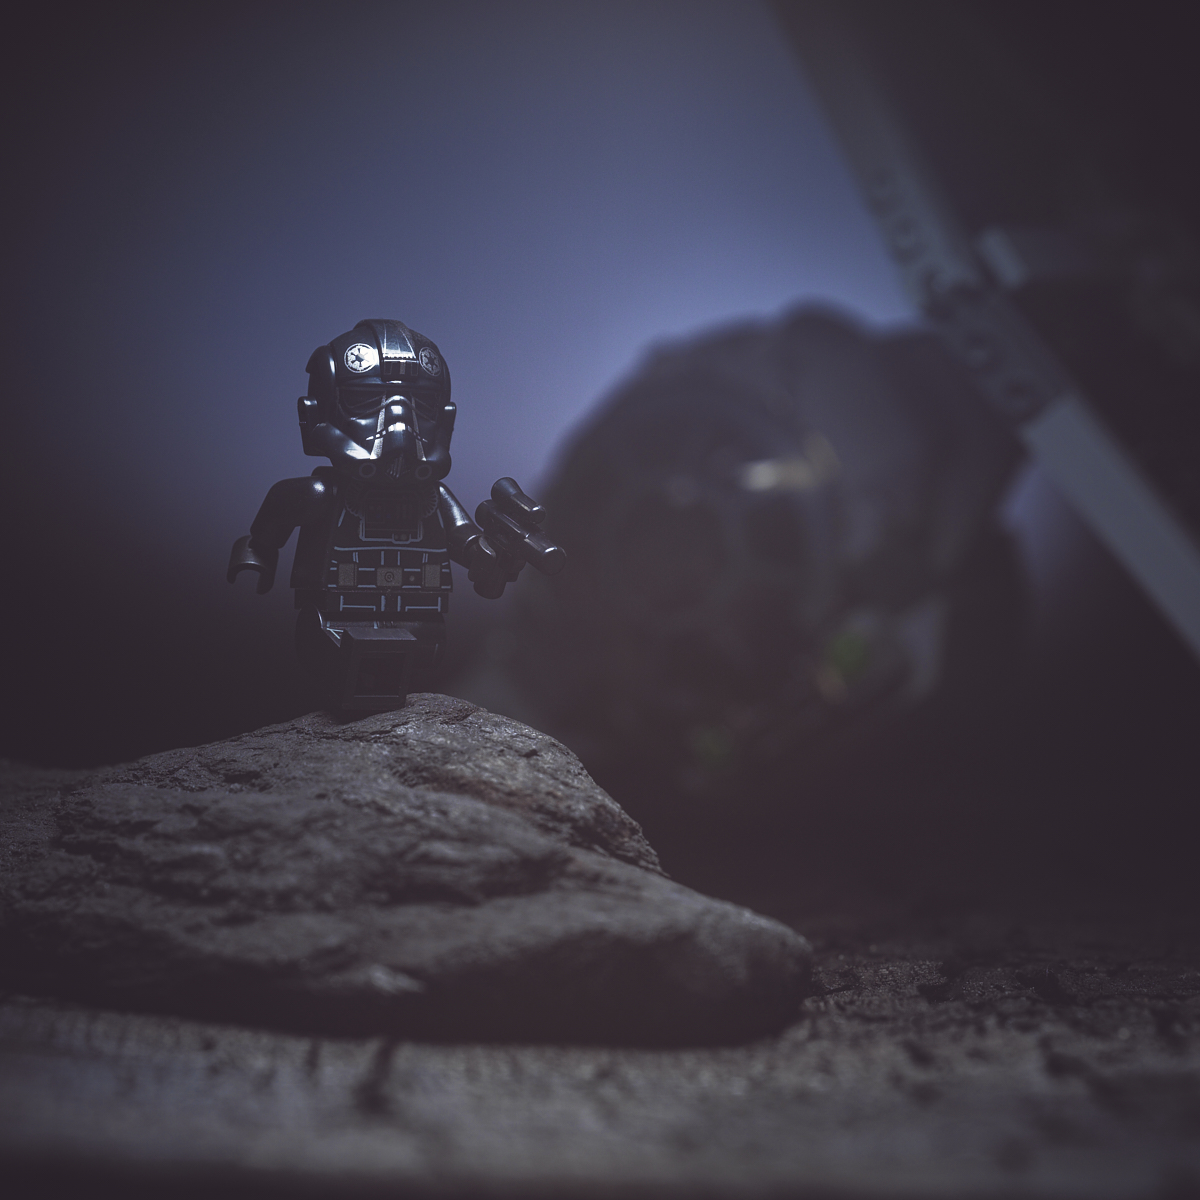
Shot down by rebel scum, and with their searchlights getting closer, the TIE Fighter pilot abandons his wrecked starfighter and slips into the night. He wonders: did the distress beacon signal get out?
…
Earlier this year, I was glad to see LEGO release this icon from the classic Star Wars trilogy – the sound of TIE fighters takes me back to childhood wonder. While this is not a review of the 75300 Imperial Tie Fighter set, I thought it worth noting that it features three new updated minifigures (so far exclusive to this set):
- NI-L8 Protocol Droid
- Stormtrooper (Dual Molded Helmet, Gray Squares on Back, Frown)
- TIE Fighter Pilot (Frown)
Very nice!
Behind the Scenes
I enjoy sharing a look at the process behind my work and my creative journey. Writing about it daily is new for me, but it seems to prompt a level of critical thinking that leads me to a deeper understanding and to new ideas.
Photography has long been my passion. With the level of technology available to us today, it’s easier than ever to take a technically competent photograph. And yet, some images still clearly ‘work’ more than others.
With LEGO photography, where we can often control almost every aspect of the scene, I believe that investing time and mental energy in the creative process can help make that difference. So I consider four fundamental things in making an image:
- The Idea
- Light
- Subject Isolation
- Composition
The Idea
I can’t quite say what prompted the idea. Since I prefer to shoot with practical effects, I knew that I wanted to feature the TIE Fighter on the ground. I also wanted to do something a little different. And then the idea came to mind: a downed ship with the pilot on the run. As my current style is almost exclusively low key photography, with predominantly dark scenes and limited (but dramatic) use of light, a night scene was the obvious choice for me. To add some tension to the visual story, I decided that I would add background lights that suggested an enemy search party.
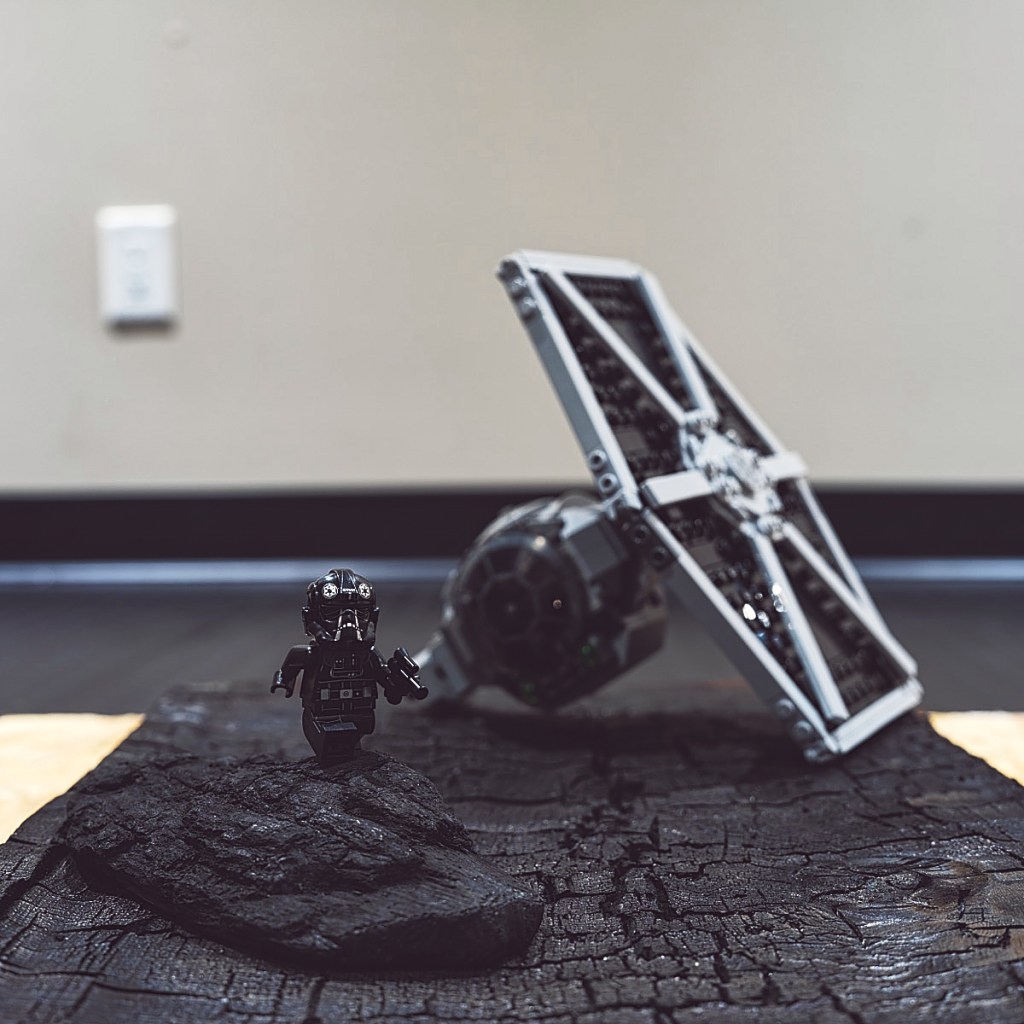
I built the scene upon a charred cedar plank, and with the minifigure balanced on a single piece of lump charcoal.
Light
As usual, I spent the most of my time working on the light.
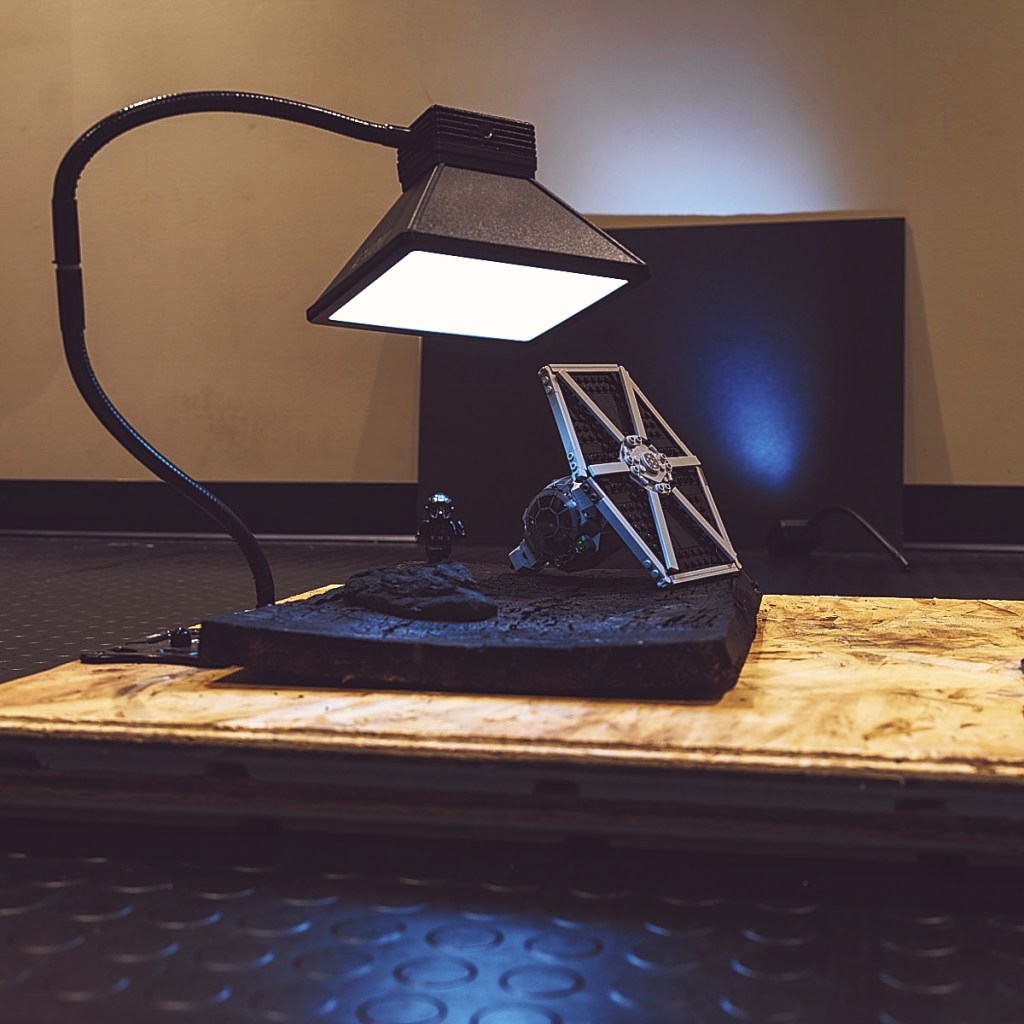
The setup was simple enough:
- Main light: Litrapro with softbox, positioned with Platypod gooseneck arms and Ultra tripod base
- Background light: LitraPro with grid, positioned with gooseneck arm
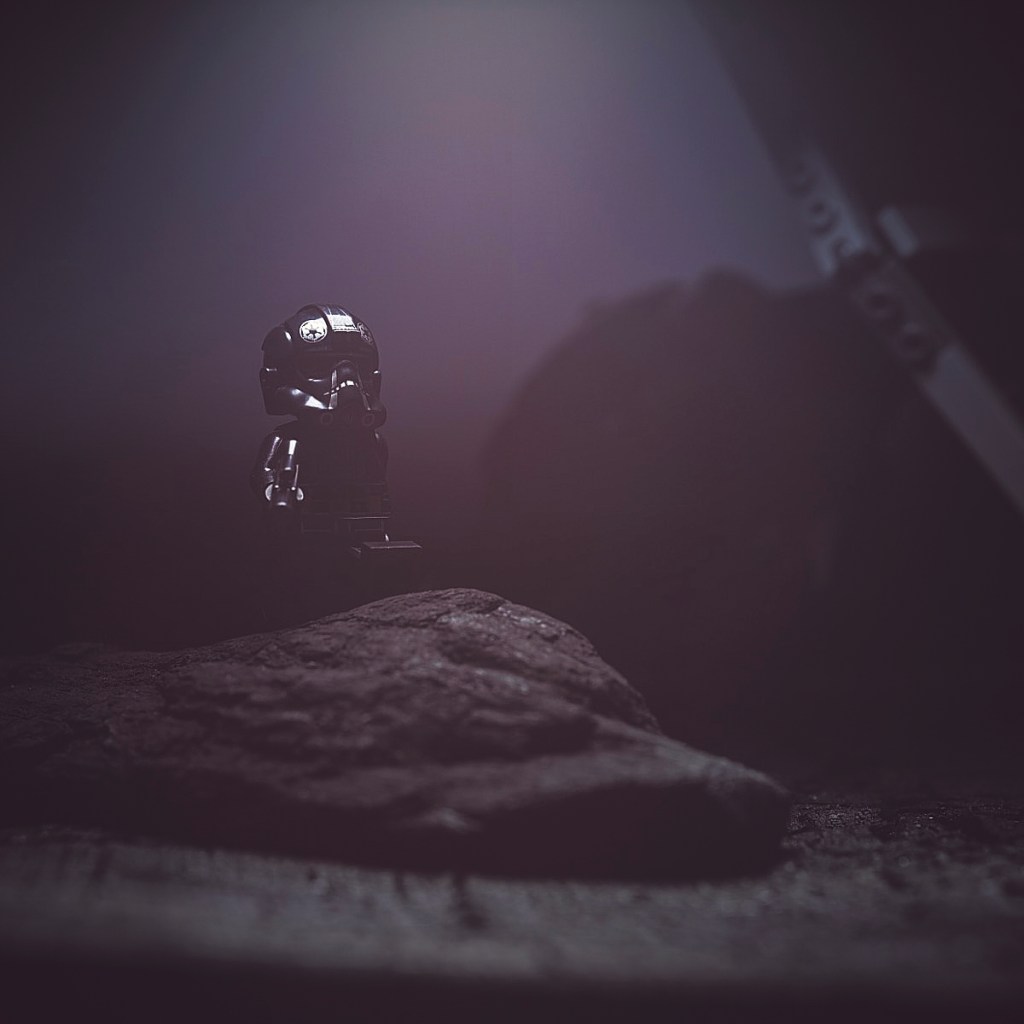
My challenge was balancing the main light spill: bright enough to make the TIE fighter recognizable, but not so bright that is distracted from the subject. Here are a couple of attempts that I felt went a little far in each of those directions:

Eventually, I found a light position with feathering that created the look I wanted.
Subject Isolation

In this final version of my photo, the brightly lit pilot is in sharp focus, while the shadowed and blurred TIE fighter is secondary and provides context. His smooth and shiny uniform contrasts with the coarse surface material in the foreground. Finally, to help his helmet stand out against the background light, I boosted blue saturation in post to enhance the separation.
Composition
I try hard to get as close to the final image as possible in camera. To help with this I compose in live view with my mirrorless camera’s rear display, using a 1:1 crop mask and grid overlay. It looked almost exactly like this:

I placed his visor exactly at a rule of thirds intersection, and shot from an angle that placed the top of his helmet and the top of the fuselage roughly level.
The bottom third is empty ground, while the top left corner shows a transition from light to shadow – this empty space further draws our eyes to the area of interest.
Tech Stuff
Instead of sharing the exact technical settings for this one photo, I’d rather share my standard operating procedure for LEGO photography, which can be applied to all of my shots with but few exceptions:
- Tripod mounted mirrorless camera set to ISO 100 and triggered with 2 second delayed shutter
- 120mm macro lens shot at f/8 and manually focused using magnified live view
- Aperture priority centre-weighted metering with exposure compensation to taste
- Post processing the RAW files with custom white balance, luma curve, saturation, contrast, sharpness, vignette, levels, and dust removal
Up Close and Personal
Macro photography allows us to see small objects in spectacular detail. For me, LEGO minifigures are perfect subject material.
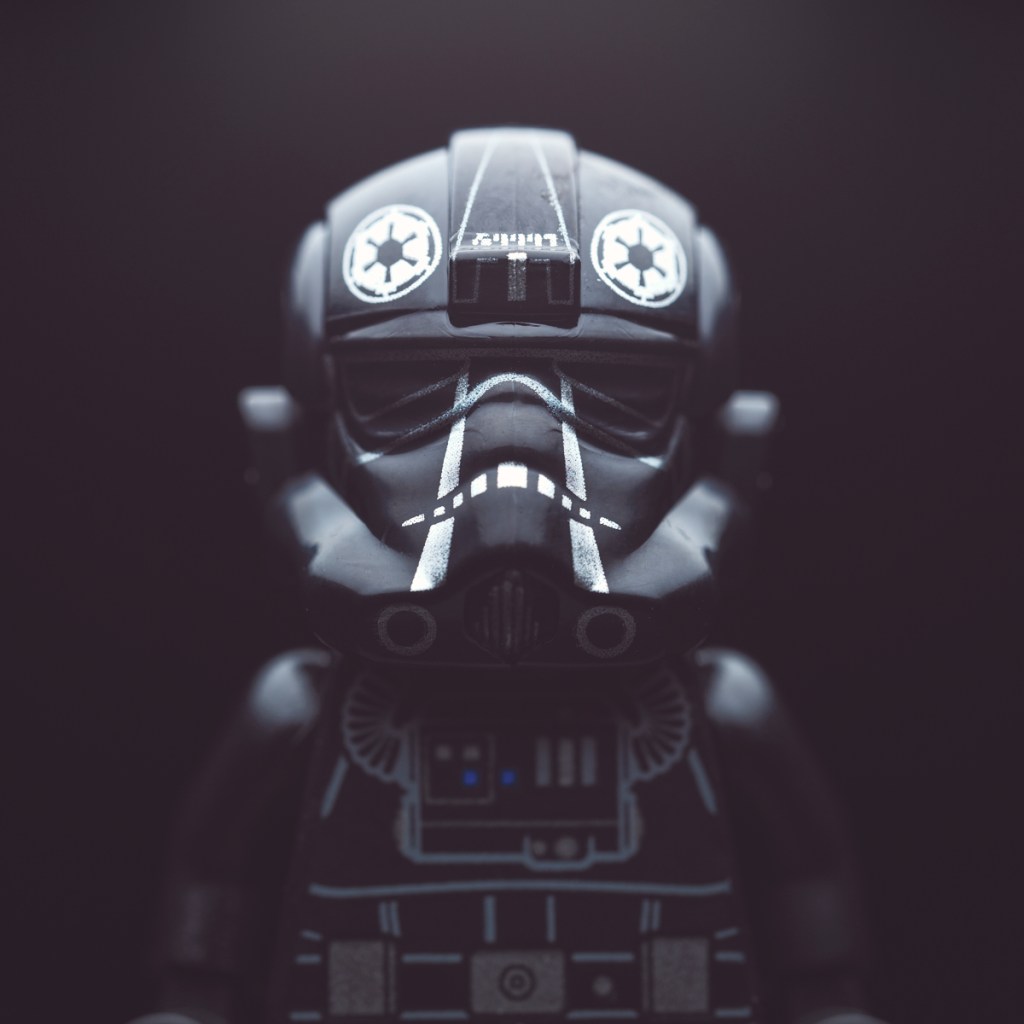
I am particularly impressed with the shape and texture of this helmet – to my eye, it catches light beautifully.
Wrap Up


Time to close out with the before and after shots, showing the result of transforming my idea through deliberate lighting, subject isolation, and composition choices.
Best,
Scott.
